| Tabitha | |
|---|---|
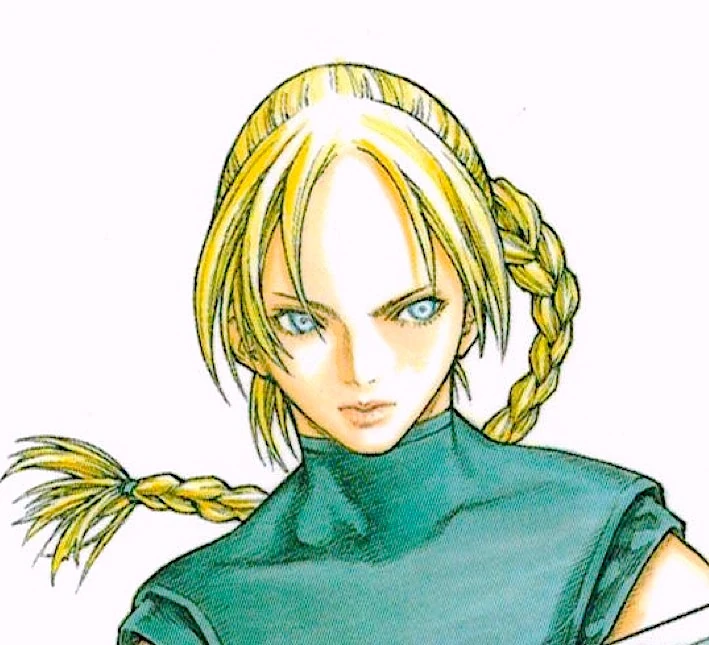 Tabitha, tankōbon 20 front fold
| |
|
VIZ Media name |
Tabitha[1] |
|
Variant |
Name: Tabitha[2] |
|
Original name |
タバサ[9] Tabasa |
|
Rank No. |
31 of the Current Generation[10] |
|
Current status |
Manga: survives the Battle of the North, deserts Organization, 7-year timeskip |
|
Ties |
Organization, Ghosts, Holy City of Rabona |
|
Class |
Unknown type: unknown ability |
|
Technique |
Unknown |
|
Quote |
I think the proper path is.... |
|
Anime voice |
Leslie Patrick and Michele Specht (en-us), |
|
First appearance |
|

Etymology[]
Origin[]
The original Japanese Claymore name, タバサ, transliterates from "Tabitha," deriving from "gazelle" in Aramaic. Allusion in Claymore unknown. Used as an English-language name since the English Reformation.
Dark Silver Eye[]
The nickname "Dark Silver Eye" is not found in the Claymore manga, "Yoma War Record" or anime. This nickname appeared in the Wikipedia article on Claymore characters in 2007 (edit now removed).[11] Oft-repeated on reference sites, forums and in fan-fiction.
Appearance[]
Claymore warrior[]
Physical[]
Typical Yagi heart-shaped face, ending in small chin. Formerly wore a single hair braid, usually in a maternal over the shoulder style similar to Ophelia. Currently wears a braided hair bun.
Uniform[]
A butterfly-shaped buckle holds 2-layer spaulders on the shoulders. Similar to Yuma's buckle. Vambraces cover the forearms up to the elbow.
Ghosts[]
During the 7-year timeskip, she replaces her Organization uniform with "Zettai Ryouiki" look—light armor worn over short-sleeve tunic, garters and garter belts, gaped stockings and short skirt.[12]
Closest to Miria in dress. Later in Scene 129, before engaging Cassandra, Tabitha reverts to her old uniform.[13]
Personality[]
Subdued. Emotionally attached to Miria. In Chaldean Numerology, the number 31—Tabitha's number—reduces to 4, the sign of youth. A "4" is fated to have an immature and sometime dependent personality. Compare to Miata and Yuma.
Datasheet[]
Class[]
Unknown type. Tabitha being a defensive type is fanfiction and forum speculation. Having no Organization datasheet in the "Yoma War Record," her ability and baselines are unknown. Appears to have a high sensing baseline.
Technique[]
Nothing specific described of her sensing technique in the manga, Yoma War Record or anime.[14]
Tabitha becomes the Ghosts' "Eyes" during the 7-year timeskip. She guides the Ghosts in attack and avoidance.[15] Sensing power of much lower resolution than Galatea's Wide Area Sensing, however.[16]
History[]
Early life unknown.
Organization[]
Battle of the North[]
Member of the battle group in Pieta during the Battle of the North. Assigned to Team Miria: Queenie (No. 20) and Yuma (No. 40).[17]
Engagement I[]
During the first engagement with the three scouts, Team Miria fights the Dreadlock awakened. Miria kills Dreadlock. Tabitha carries Yuma, who lost her arm.[18]
Engagement II[]
Manga and anime diverge here.
Manga[]
Tabitha appears in Yuma's flashback. In the banquet hall of the Eastern Inn, Miria holds a meeting with the battle group. She tells everyone to take a half dose of suppressant. If rendered unconscious during combat, a warrior will radiate no aura, making her appear dead to both the Northern Army and Organization.[19]
Before the second engagement, Tabitha appears in Scene 56. After the last combat of Pieta, seven survive—Miria, Cynthia, Deneve, Helen, Tabitha, Yuma and Clare.[20]
Anime[]
Tabitha speaks about her fears at the inn lobby, angering Undine, who leaves for the store-room.[21]

Tabitha at inn

Later, the Northern Army invades Pieta. After losing three members, versus five Claymore warriors, the Northern Army retreats. Rigaldo sequence similar to manga.[22]
Tabitha last appears helping an injured Miria during the inn lobby scene. Tabitha is put in charge, along with Cynthia, of the wounded.[23]
7-year timeskip[]
Alfons[]
Tabitha is one of seven "Ghosts" who desert Organization. Hiding in the mountains, they train with Yoma powerless techniques. Miria serves as captain.
Despite risking exposure, Ghosts rescue Dabi hunt.[24] Tabitha helps Cynthia give first aid to hunt members.[25]
Meanwhile, in a deserted village, Clare finds evidence that Raki may still be alive. Back at the cavern hideout, she announces her intent to go south. Miria tests Clare's fighting ability. Satisfied, Miria says she will accompany Clare. But everyone decides to go en masse.[26]
Toulouse[]
Agatha[]
The Ghosts find Rabona under siege by Agatha.[27] Tabitha guides warriors as to location of Agatha's vital core.[28] Afterward, Miria relates her research on the Organization—Miria's theory.[29]
Left behind[]
Miria tells everyone to take care of personal business before the last fight with the Organization. Clare travels west to Lautrec—with Cynthia and Yuma—to find Raki. Helen goes south to Mucha with Deneve.
Miria will wait in Rabona for everyone's return. But she adds one caveat: "When the time comes, I'll go forward alone if I must,"[30] foreshadowing the events of Scene 106.
Alicia-Beth[]
Later, Tabitha senses Alicia and Beth speeding westward.[31] Miria suspects their target is Riful. With Alicia and Beth preoccupied, the Organization's main defense is gone.[32]
Miria sees her opportunity. To prevent Tabitha from following, Miria wounds Tabitha. Then sets out alone for Organization Headquarters.[33]
Revenge[]
After Miria's failed attempt to destroy the Organization, awakened beings and Yoma invade Rabona. Tabitha, Galatea, Clarice and Miata attempt ot defend the city with the human guards. The arrival of the Ghosts finally defeats the invasion. The resembled Ghosts repel the invasion.[34]
After mutual recriminations over Miria and Clare,[35] the warriors break up a fight between Tabitha and Deneve, who prevents Tabitha from going alone to Sutafu to rescue Miria.[36]
Sutafu[]
Anastasia's hunt[]
Ghosts decide en masse to rescue Miria, anyway. Along the way, the Ghosts save Anastasia's hunt.[37] But at a juncture, Deneve lets Tabitha decide which path to take.[38] Tabitha chooses to destroy a Yoma-making facility over Miria, believing that would have been Miria's own choice.[39]
Miria[]
Ghosts find Miria battling an awakened Hysteria. Anastasia yanks Miria to earth.[40]
Rescue[]
Six warriors attack Hysteria—Deneve, Anastasia, Dietrich, Nike, Helen and Tabitha. They use Anastasia's Winged Technique to stay aloft, high-wire style.[41]
Yoma power hidden, Tabitha succeeds in approaching Hysteria, then clipping her wings. But when the others close in, Hysteria instantly retreats to earth. The warriors are left crossing each others swords.[42]
Counterattack[]
Suddenly, Hysteria flies skyward, destroying Deneve's left arm, then Nike's right.[43] High above the suspended warriors, Hysteria fires something—it carves out the side of Dietrich's abdomen. Only Anastasia, Helen and Tabitha remain uninjured.[44]
End of Organization[]
After the deaths of Hysteria and Roxanne, Miria, Deneve and Helen invade the Executive facility.
Meanwhile, Tabitha helps regenerate the wounded on the battlefield. Soon Miria announces the death of Limt.[45]
Two combats[]
After the Ghosts return to Rabona, they and the Rabona guards combat two awakeneds that land in the city.
Miria and Clare dodge Tapeworm awakened's attack. Tapeworm bristles with dozens of armless torsos, each identical—only one contains the vital organs, according to Tabitha. But the situation is complicated by the awakened's Yoma aura spread evenly among the torsos.[46]
Miria and Clare race to find the vital core. Tabitha observes Miria and Clare reaching the last and vital torso.[47]
Cassandra[]
Miria, Deneve, Helen and Clare fight the awakened Cassandra. Elsewhere in the hills, Cynthia, Tabitha and Yuma collectively synchronize their Yoma power with Cassandra, a technique that has parallels with Yoma Energy Alignment and Control and Yoma power harmonization. The goal is breaking the spell that Priscilla has over Cassandra's mind. And preventing the two from merging.[48]
They fail to synchronize with Cassandra. But despite this crisis, they become even more concerned about the mysterious, yet familiar aura that Helen noticed earlier.[49]
References[]
Tankōbon Claymore volumes cited are VIZ Media (en-us) editions, unless otherwise noted. Manga scenes (chapters) not yet translated cite Shueisha tankōbon (ja) editions. Manga scenes not yet published in tankōbon form cite Jump SQ (ja) editions. Fragments of Silver Omnibus (総集編 銀の断章 Gin no Danshou) 1–3, Shueisha, are only available in Japanese. Anime scenes (episodes) cited are FUNimation (en-us) editions, unless otherwise noted.
- ↑ Claymore 9, Scene 51, p. 172
- ↑ Claymore 9, Ediciones Glénat España, Scene 51, p. 172
- ↑ Claymore 9, Glénat Édition Française, Scene 51, p. 172
- ↑ Claymore 9, Star Comics, Scene 51, p. 168
- ↑ Claymore 9, Daewon CI, Scene 51, p. 172
- ↑ Claymore 9, Comix-ART, Scene 51, p. 172
- ↑ Claymore 9, Culturecom, Scene 51, p. 173
- ↑ Claymore 9, Ever Glory, Scene 51, p. 172
- ↑ Claymore 9, Shueisha, Scene 51, p. 172
- ↑ Fragments of Silver Omnibus 3, "Yoma War Record III," p. 731
- ↑ Animesuki Claymore forum, 6 September 2007
- ↑ Claymore 15, Scene 78, p. 23
- ↑ Jump SQ, September 2012, Claymore, Scene 129, pp. 629–631
- ↑ Fragments of Silver Omnibus 3, "Yoma War Record III," p. 731
- ↑ Claymore 12, Scene 68, p. 152
- ↑ Claymore 17, Scene 90, pp. 10–11
- ↑ Claymore 9, Scene 51, p. 172; Claymore, Anime Scene 18
- ↑ Claymore 10, Scene 54, p. 89; Claymore, Anime Scene 19
- ↑ Claymore 12, Scene 66, pp. 83–87
- ↑ Claymore 12, Scene 66, pp. 93–94
- ↑ Claymore, Anime Scene 20
- ↑ Claymore, Anime Scene 21
- ↑ Claymore, Anime Scene 24
- ↑ Claymore 12, Scene 65, p. 74
- ↑ Claymore 12, Scene 66, p. 75
- ↑ Claymore 12, Scene 67, pp. 132–133
- ↑ Claymore 14, Scene 77, pp. 125
- ↑ Claymore 15, Scene 77, p. 23
- ↑ Claymore 15, Scene 79–Scene 80, pp. 52–77
- ↑ Claymore 15, Scene 82, p. 154
- ↑ Claymore 17, Scene 90, p. 9
- ↑ Claymore 17, Scene 90, p. 19
- ↑ Claymore 19, Scene 106, pp. 128–129
- ↑ Claymore 20, Scene 108, p. 21–24
- ↑ Claymore 20, Scene 108, pp. 33–37
- ↑ Claymore 20, Scene 109, pp. 52–54
- ↑ Claymore, Scene 111, p. 122
- ↑ Claymore 20, Scene 112, p. 157
- ↑ Claymore 20, Scene 113, p. 167
- ↑ Jump SQ, January 2012,Claymore, Scene 121, p. 205
- ↑ Jump SQ, February 2012, Claymore, Scene 122, p. 621
- ↑ Jump SQ, February 2012, Claymore, Scene 122, p. 624–627
- ↑ Jump SQ, February 2012, Claymore, Scene 122, pp. 632–633
- ↑ Jump SQ, February 2012, Claymore, Scene 122, p. 634
- ↑ Jump SQ, June 2012, Claymore, Scene 126, p. 258–261
- ↑ Jump SQ, November 2012, Claymore, Scene 131, pp. 378–380
- ↑ Jump SQ, November 2012, Claymore, Scene 131, pp. 382–389
- ↑ Jump SQ, January 2013, Claymore, Scene 133, pp. 771–772
- ↑ Jump SQ, January 2013, Claymore, Scene 133, p. 775