| Rafaela | |
|---|---|
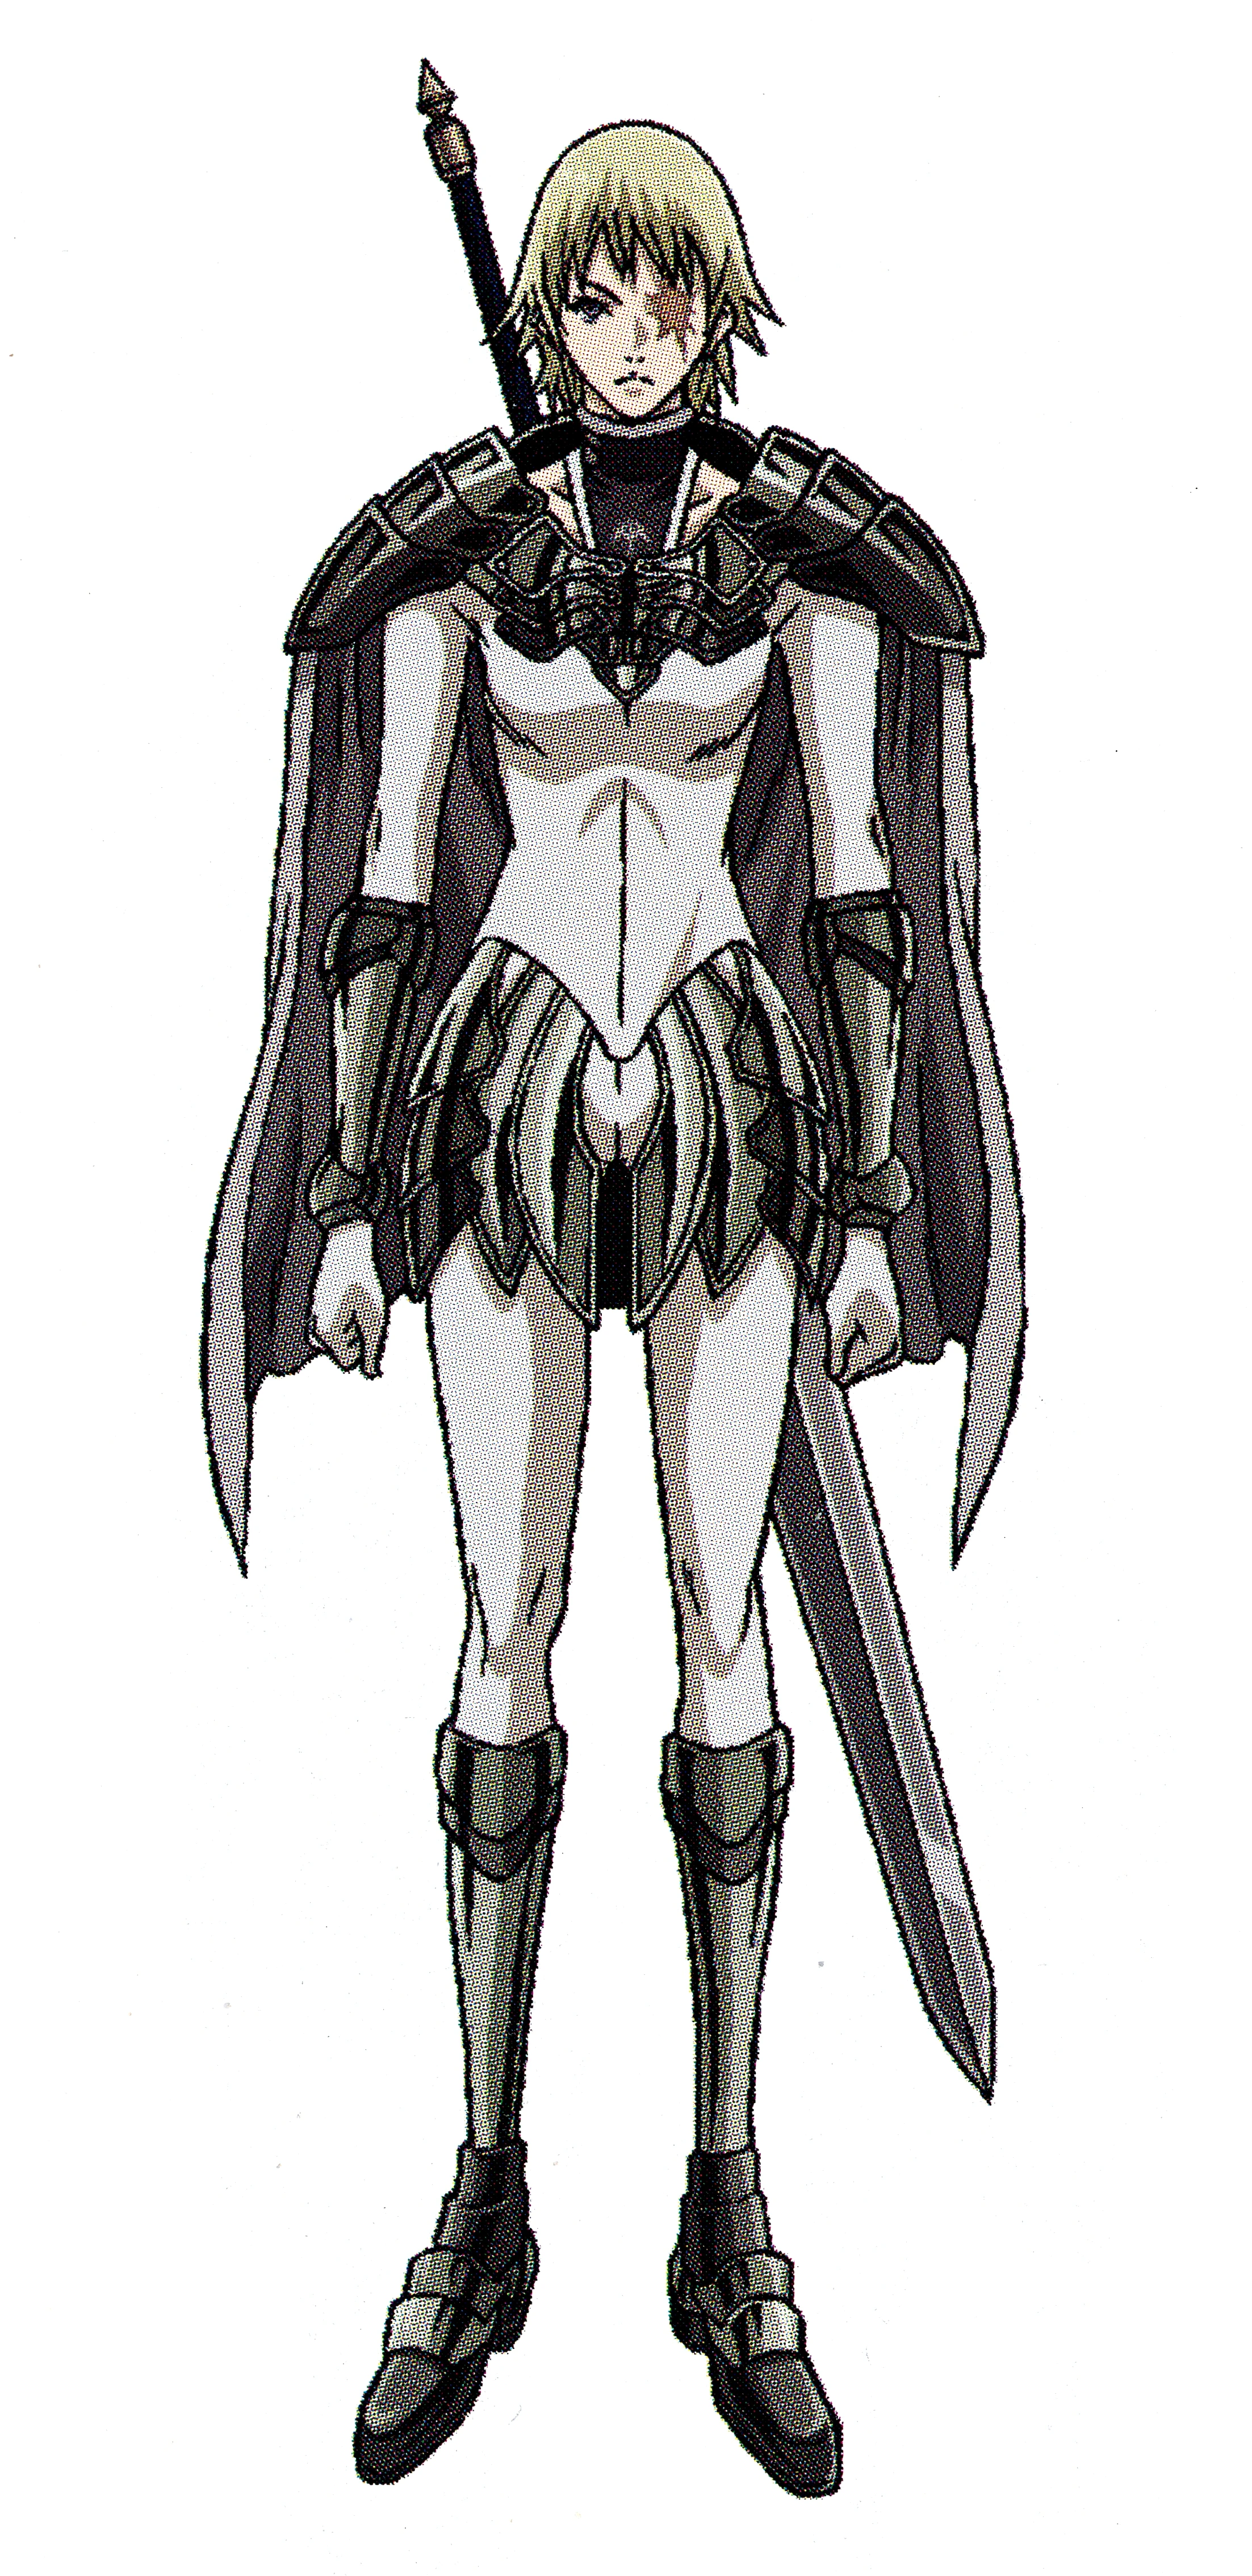 Rafaela in uniform
| |
|
VIZ Media name |
Rafaela[1] |
|
Variant |
Rafael[2][3] (de anime |
|
Original name |
ラファエラ[13] Rafaera |
|
Rank No. |
2 of the Old Generation (Luciela Era),[14] 5 of Current Generation[15] |
|
Status |
Dead (merges with Luciela), awakens into the Destroyer |
|
Ties |
Organization |
|
Class |
Offensive:[16] 妖気抑制[17] Yōki Yokusei |
|
Technique |
完全妖気抑制[18] Kanzen Yōki Yokusei |
|
Quote |
Which of you is Clare?[20] |
|
Anime voice |
Claudia Galdy (de), |
|
First appearance |
|

Etymology[]
The original Japanese Claymore name, ラファエラ, transliterates from "Rafaela," deriving from the Hebrew רפאל "Raphael" (healing God).
Possibly ironic allusion to character not healing her eye as penance for losing Luciela in the "Controlled Awakening" experiment.
"Raphael" is either an archangel, or demon, depending on tradition. Possible allusion to Renaissance artist Raphael, originally spelled "Raffaello."
Name of a city in Argentina.
Appearance[]
Physical[]
Hairstyle: a spiky bob frames a heart-shaped face. Rafaela usually wears a stoic expression. The tomboyish face resembles Rosemary, Hilda and Clarice.
The left eye is an expressionistic image of blindness and is not necessarily a scar. The jagged star pattern changes shape from panel to panel and sometime does not appear at all. This blindness motif is repeated with Galatea.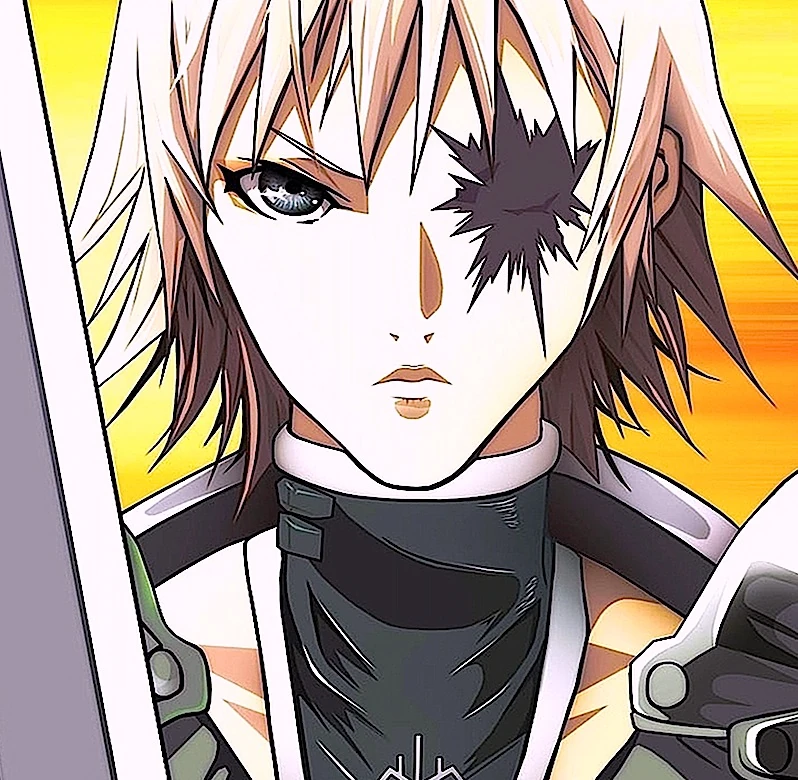
Rafaela from anime
Uniform[]
During the Luciela Era of the Old Generation, the current design appears—the dicky embossed with the warrior's symbol, the sword carrier with horns that hold the cape. And the faulds skirt.
The sowbug-like buckle holds 3-layer spaulders—unique in that the plates are stacked on the shoulder in reverse order to the norm.
The faulds skirt design is also unique—bands are layered on the hip in the sowbug manner. The skirt also has a protective plate on the seat. See illustration below.
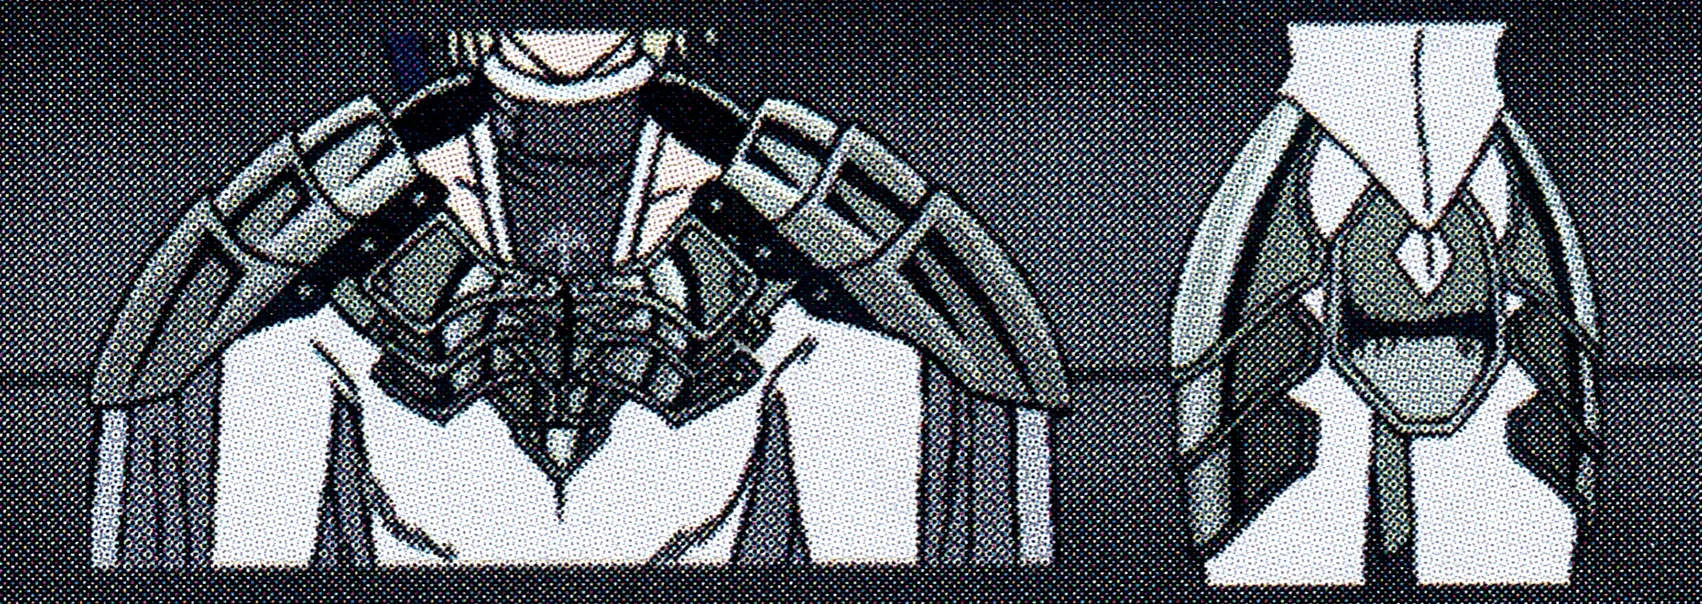
Rafaela's equipment
Personality[]
Typical stoic warrior persona, due to tragic past. Lives only to kill her awakened sister.[21]
In Chaldean Numerology, the number 5—Rafaela's number during the Current Generation—is the number of androgyny. A 5 tends ot place the welfare of others before oneself.
Datasheet[]
Baseline[]
Height: 175cm (5ft 8.89in).[22] Dominant arm: right[23]
|
|
Class[]
Rafaela is an offensive type[24] warrior, her mental ability being Yoma Energy Suppression.[25]
Technique[]
Yoma Energy Suppression enables Full Yoma Energy Suppression.[26]
Rafaela also uses a Yoma energy membrane technique.
Organization assessment[]
High talented test subject that served as No. 2.
History[]
Luciela I[]
In flashback, warrior No. 1, Luciela, fully awakens during first Controlled Awakening experiment. Her younger sister, warrior No. 2, Rafaela, is unable to change back Luciela. Luciela wreaks havoc on Organization Headquarters and escapes.[27]
Rubel meets Rafaela in her apartment. He tells her that she has been decommissioned by the Organization. He further suggests she leave.[28]
Exile[]
Rafaela passes through a town near headquarters. She overhears that a pair of identical twin babies may have been handed over to Organization.[29]
At a forest pond, Rafaela meets a young runaway trainee, Teresa.[30]
After an indeterminate number of years, Rubel finds Rafaela living in a cave. He tells her that the now adult Teresa was lost, along with warriors No. 2 through 5. He offers the position of No. 5 to Rafaela, who accepts in exchange for Luciela's whereabouts.[31]
Hidden valley mission[]
Several years later, Clare leaves Ilena's hidden valley. Ilena stands outside, gazing into mountains. Rafaela approaches from behind. Rafaela tells Ilena that the Organization has ordered her purged for desertion.[32]

Ilena meets Rafaela
Meanwhile, Clare travels through forest. Suddenly, she senses something amiss in Ilena's arm. But a loud noise interrupts her thoughts.[33]
Clare I[]
3-month timeskip. Despite Clare's rebuffs, Jean insists on following her through the forest. Jean wants to repay Clare for saving her life. Suddenly, Rafaela confronts them. She asks which is Clare.[34]
Clare is confused as she failed to sense the warrior's Yoma aura. Rubel appears behind the warrior.[35]
Rubel reveals that Rafaela excels in aura concealment. Also, that she can defeat both Clare and Jean. But because Clare aided the warriors at the Witch's Maw, the Organization will pardon her for desertion, provided she join the Organization's battle group assembling up north.[36]
Luciela II[]
After the Organazation's defeat in Pieta, Isley invades Mucha. Rafaela watches him defeat Luciela.[37] Later, Rafaela finds Luciela kneeling in a stream. They embrace, but Rafaela breaks Luciela's back. Rafaela injects Yoma power into Luciela and they merge.[38]
Later Riful, arriving too late to help Luciela, meets Isley and Priscilla. Riful retreats.[39] But Riful finds the merged sisters and brings them back to Lautrec.[40]
Clare II[]
Post-7-year timeskip.
Dream world[]
After Riful and Dauf leave, Clare enters castle (Witch's Maw II) and finds chamber where hangs Luciela x Rafaela. Clare enters its mind.[41]
Dream within dream[]
In replay of Scene 50 and Anime Scene 18, Clare leads Jean through forest. Clare stops, sensing a powerful aura—Rafaela's.[42]
When Clare reaches out to touch Jean, no one is there. Rafaela attacks. Clare uses Windcutter, but is beheaded.[43]
"Real" dream[]
Clare awakes in darkness. Fight was only a dream within a dream. Rafaela says Clare entered Rafaela's mind. And everything and one are regenerated from Clare's memories.[44]
Rafaela says there is "something" that Clare must know. And adds that Clare is making "a big mistake."[45]
But Clare has little time left before Rafaela awakens. Clare must defeat Rafaela—Clare's death here would result in her physical death.[46]
Clare resorts to Quicksword and kills Rafaela with the right arm of Ilena, who Rafaela executed seven years ago.[47]
Awakening[]
In a Yoma power explosion, Rafaela awakens. As Clare is hurled back, all Rafaela's memories and emotions are inscribed into Clare. Among which is "the thing you must know."[48]
Elsewhere, Cynthia senses Rafaela's memories and emotions streaming into Clare.[49]
Clare's naked body emerges from the mass of Yoma tissue. She gazes on sky-high entity—the Destroyer—a demonic parody of twin goddesses of love, Teresa and Clare.[50]
Last act of Rafaela as a human is returning Clare's sword and clothes.[51]
Tapeworm awakened[]
In Rabona, Miria and Clare dodge the Tapeworm awakened's attack. Tapeworm bristles with dozens of armless torsos, each identical—only one contains the vital organs, according to Tabitha. But the situation is complicated by the awakened's aura spread evenly among the torsos.[52]
Miria and Clare race to find the vital core. Clare realizes her movements are those of Rafaela, who used a Yoma Energy Membrane technique, allowing Clare to sense movement beyond her peripheral vision. Miria and Clare reach the last torso and together they make the final strike.[53]
References[]
Tankōbon Claymore volumes cited are VIZ Media (en-us) editions, unless otherwise noted. Manga scenes (chapters) not yet translated cite Shueisha tankōbon (ja) editions. Manga scenes not yet published in tankōbon form cite Jump SQ (ja) editions. Fragments of Silver Omnibus (総集編 銀の断章 Gin no Danshou) 1–3, Shueisha, are only available in Japanese. Anime scenes (episodes) cited are FUNimation (en-us) editions, unless otherwise noted.
- ↑ Claymore 6, Scene 31, p. 112
- ↑ Claymore, Kazé Deutschland, Anime Scene 11
- ↑ Claymore, Kazé Anime, Anime Scene 11
- ↑ Claymore 6, Tokyopop, Scene 31, p. 112
- ↑ Claymore 6, Ediciones Glénat España, Scene 31, p. 112
- ↑ Claymore 6, Glénat Édition Française, Scene 31, p. 112
- ↑ Claymore 6, Star Comics, Scene 31, p. 108
- ↑ Claymore 9, Daewon CI, Scene 50, p. 137
- ↑ Claymore 6, Comix-ART, Scene 31, p. 112
- ↑ Claymore 7, Comix-ART, Scene 38, p. 150
- ↑ Claymore 6, Culturecom, Scene 31, p. 112
- ↑ Claymore 6, Ever Glory, Scene 31, p. 112
- ↑ Claymore 6, Shueisha, Scene 31, p. 112
- ↑ Fragments of Silver Omnibus, "Yoma War Record III," p. 731
- ↑ Fragments of Silver Omnibus, "Yoma War Record III," p. 731
- ↑ Fragments of Silver Omnibus, "Yoma War Record III," p. 725
- ↑ Fragments of Silver Omnibus 3, "Yoma War Record III," p. 725
- ↑ Fragments of Silver Omnibus, "Yoma War Record III," p. 725
- ↑ Jump SQ, November 2012, Claymore, Scene 131, p. 387
- ↑ Claymore 9, Scene 50, p. 138
- ↑ Claymore 12, Scene 64, pp. 24–25
- ↑ Fragments of Silver Omnibus, "Yoma War Record III," p. 725
- ↑ Fragments of Silver Omnibus, "Yoma War Record III," p. 725
- ↑ Fragments of Silver Omnibus, "Yoma War Record III," p. 725
- ↑ Fragments of Silver Omnibus, "Yoma War Record III," p. 725
- ↑ Fragments of Silver Omnibus, "Yoma War Record III," p. 725
- ↑ Claymore 12, Scene 64, pp. 7–8
- ↑ Claymore 12, Scene 64, p. 13
- ↑ Claymore 12, Scene 64, pp. 14–15
- ↑ Claymore 12, Scene 64, p. 16
- ↑ Claymore 12, Scene 64, pp. 21–26
- ↑ Claymore 7, Scene 38, pp. 149–152
- ↑ Claymore 7, Scene 38, pp. 152–153; Claymore, Anime Scene 14
- ↑ Claymore 9, Scene 50, pp. 135–136
- ↑ Claymore 9, Scene 50, p. 137
- ↑ Claymore , Scene 50, pp. 137–141; Claymore, Anime Scene 18
- ↑ Claymore 11, Scene 63, p. 189
- ↑ Claymore 12, Scene 64, pp. 30–37
- ↑ Claymore 13, Scene 82, pp. 50–57
- ↑ Claymore 13, Scene 82, p. 61
- ↑ Claymore 17, Scene 91, pp. 61–63
- ↑ Claymore 17, Scene 92, pp. 65–66
- ↑ Claymore 17, Scene 92, pp. 68–74
- ↑ Claymore 17, Scene 92, pp. 76–77
- ↑ Claymore 17, Scene 92, pp. 77–78
- ↑ Claymore 17, Scene 92, p. 78
- ↑ Claymore 17, Scene 92, pp. 83–87
- ↑ Claymore 17, Scene 92, pp. 89–91
- ↑ Claymore 17, Scene 92, p. 92
- ↑ Claymore 17, Scene 93, pp. 106–111
- ↑ Claymore 17, Scene 93, pp. 107–108
- ↑ Jump SQ, November 2012, Claymore, Scene 131, pp. 378–380
- ↑ Jump SQ, November 2012, Claymore, Scene 131, pp. 382–389