| Miata | |
|---|---|
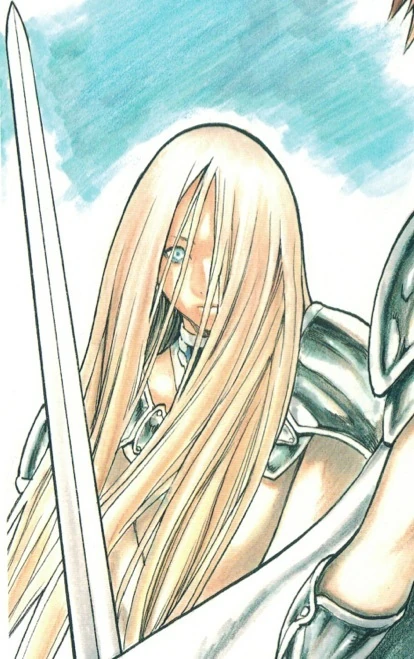 Miata from Memorabilia
| |
|
VIZ Media name |
Miata[1] (en-us |
|
Variant |
Name: Miata[2][3][4][5] (de |
|
Original name |
ミアータ[8] Miāta |
|
Rank No. |
4 of the Next Generation[9] |
|
Status |
Alive, deserted |
|
Ties |
Organization, Clarice, Ghosts, Holy City of Rabona |
|
Class |
Offensive[10] |
|
Technique |
Controlled Awakening |
|
Quote |
Mama.[11] |
|
First appearance |
|

Etymology
Origin
ミアータ transliterates from "miata," Old High German for "reward," according to A Middle-English Dictionary, by Stratmann and Bradley.
Not be confused with ミヤタ Miyata (bicycle manufacturer). Sports car uses Old High German word for US market only. Known elsewhere as MX-5.
Nicknames
English language monikers such as "Blood Eyes," "Blood Eye," "Red-eyed Warrior" and the like are unknown in Japanese. "Blood Eyes" appeared on English language forums as early as June 2007.[12] A fan-made datasheet using "Blood Eyes" appeared in 2008.[13]
A red-eyed warrior appears on the front jacket face/cover panel of the Claymore 5 tankōbon. Despite the similarity with Miata, the warrior is Teresa.
Appearance
Claymore warrior
Physical
Miata appears as a "tween," 8–12 years old. Waist-long peek-a-bang hair hides her face. During an attempted bathing by Clarice, Miata reveals her face when hiding behind Father Vincent.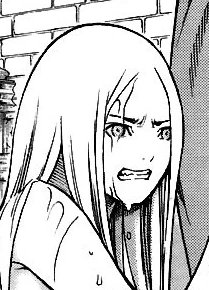
Miata's face
Uniform
A heater shield-shaped buckle holds up 2-layer spaulders on the shoulders. The faulds skirt has no seat plate.
Awakened
Fully awakened, Miata is a plumed, multi-winged dragon-worm with a lizard-like head similar to Beth's. The jaw resembles a 3-prong gear puller. The overall design appears to be an elaboration of the Aztec god Quetzalcoatl, especially as depicted by the Mexican painter Diego Rivera.[14]
Personality
Suffers from childhood regression disorder, hence the breasting-feeding on Clarice. May be result of childhood trauma as is the case of most Claymore warriors. Protective of Clarice. Dislikes bathing.[15]
In Chaldean Numerology, the number 4, Miata's number, is often viewed as the number of immaturity.
Datasheet
Class
Miata is an offensive type.[16] Having no Organization datasheet in the "Yoma War Record," her ability and baselines are unknown. Appears to have high strength and sensing baselines.
The strength baseline is apparent as her tearing apart Yoma with bare hands shows.[17]
Technique
Sixth sense
Though no specific technique is ascribed to her, Rado describes a heightened, intuitive state of her five senses, which he calls the 六番目の感覚[18] roku-banme no kankaku ![]() (the sixth sense)[19] This use of "sixth sense" is generic and not a proper name.
(the sixth sense)[19] This use of "sixth sense" is generic and not a proper name.
The proper name "Quick Perception" is a scanlation invention which does not appear in official editions.
Controlled Awakening
During Europa's attack on Rabona, Galatea and Clarice together use Controlled Awakening with Miata, the three acting like Alicia and Beth.
Miata awakening
Despite that neither Galatea or Clarice are twin sisters of Miata, Controlled Awakening is made possible by Miata's innocence, her young mind unfettered with extraneous thoughts.[20] Galatea and Clarice fulfill the role of Mind Share/Full Control, while Miata fulfills Mind Share/Full Release.
History
Clarice
After an Executive meeting, Rado reassigns Clarice to assist Miata. Inside Miata's apartment, Clarice finds sitting in the darkness. Suddenly Miata attacks Clarice with her sword, but instead of killing Clarice, Miata rips open Clarice's shirt and begins to mimic breastfeeding. Clarice continues to let Miata breast-feed on her, which calms Miata, whose mind has regressed to infancy.[21]
Later, Limt, satisfied with Clarice "stabilizing" Miata's mind, assigns them to purge Galatea for desertion.[22]
Rabona
Journey
Despite her size and youth, Miata destroy Yoma and awakened beings with ease. This frightens Clarice more than the Yoma themselves.[23]
Miata heightened senses lead them to the Holy City of Rabona.[24]
Mystery
Sid, after helping Clarice and Miata escape the guards, takes them to a guardhouse in a cemetery. Inside is Galk's office.[25] During the ensuing talk, Galk says that locals have disappeared and suspects a Yoma is in the city. On Clarice's questions about any newcomers to Rabona, Sid confirms that a woman of Galatea's description lives in town.[26]
Sister Latea
Elsewhere, Galatea says farewell to orphans leaving church. And to Father Mohr. Clarice and Miata arrive as expected.[27]
Complication
In a dialog with the awakened Agatha, Galatea reveals she released Yoma power, tricking the Organization into sending a purge team to Rabona. She had hoped they would fight Agatha instead. But Clarice and Miata ignore Agatha and attack Galatea. A 3-way fight develops as Galatea fights both the purge team and Agatha.[28]
Galk leads the counterattack—a diversion. Sid climb on Agatha and attacks the human-looking appendage. But her tentacles ensnare him. Galatea frees Sid and throws him to Clarice.[29]
Agatha decimates a squad of Rabona guards. Miata, who previously ignored Agatha, now attacks. But Agatha says it is too late.[30]
Miata tries pulling Agatha's tentacles, but her hands come off at the wrists.[31]
Miata loses her hands
Agatha's tentacles pin Miata to a roof. And Galatea to a wall.[32]Agatha's tentacles ensnare Miata, now unable to escape. Clarice runs away in shame, only to reappear behind Agatha. Clarice frees and escapes with Miata, now critically wounded.[33] With Galatea pinned to a wall high above the street, the Holy City is defenseless.[34]
Surprise visitors
Clare and the Ghosts show up.[35] Clare immobilizes Agatha by cutting off her legs.[36]
Agatha is forced to abandon her crab form and contracts into mummy, with tape-like tentacles. As the Ghosts whittle down this false body, Agatha escapes into her true core.[37] She takes Galatea hostage. But Clare, per Galatea's suggestion, uses Quicksword to kill Agatha.[38]
Galatea offers to submit to execution. But Clarice and Miata desert Organization instead. Afterward, Miria relates her research on the Organization—Miria's theory.[39]
Miria puts Galatea in charge of Clarice and Miata.[40]
Revenge
After Miria's failed attempt to destroy the Organization, awakened beings and Yoma invade Rabona. Clarice, Miata, Galatea and Tabitha defend the city with the Rabona guards. Arrival of the Ghosts finally turns the tide of battle.[41]
Galatea suspects the Organization sent the invasion, due to Miria's attack.[42]
Final engagement
City hall meeting
After the destruction of the Organization, the Ghosts return to Rabona. In a city hall meeting, Miria explains the situation to the Rabona guards and the Claymore warriors. Despite Miria's misgivings, she lets the human guards, Clarice and Miata to stay and defend the city.[43]
Return of Clare
Clare is freed from the cocoon,[44] as well as the Destroyer and Priscilla, whose combat engulfs an awakened audience.[45]
Two female awakened are hurled into the city. They awakened into huge tapeworm- and origami-like forms.[46]
Miata then Clarice attack the Origami awakened. Clarice is thrown back, but is rescued by Cynthia and Yuma.[47]
Miata again attacks and creates a massive wound, but Origami instantly regenerates. Deneve observes that only a single attack that destroys most of the body will work.[48]
Galatea's trump card
During Europa's invasion of the city, Galatea falls back on her emergency plan.[49]
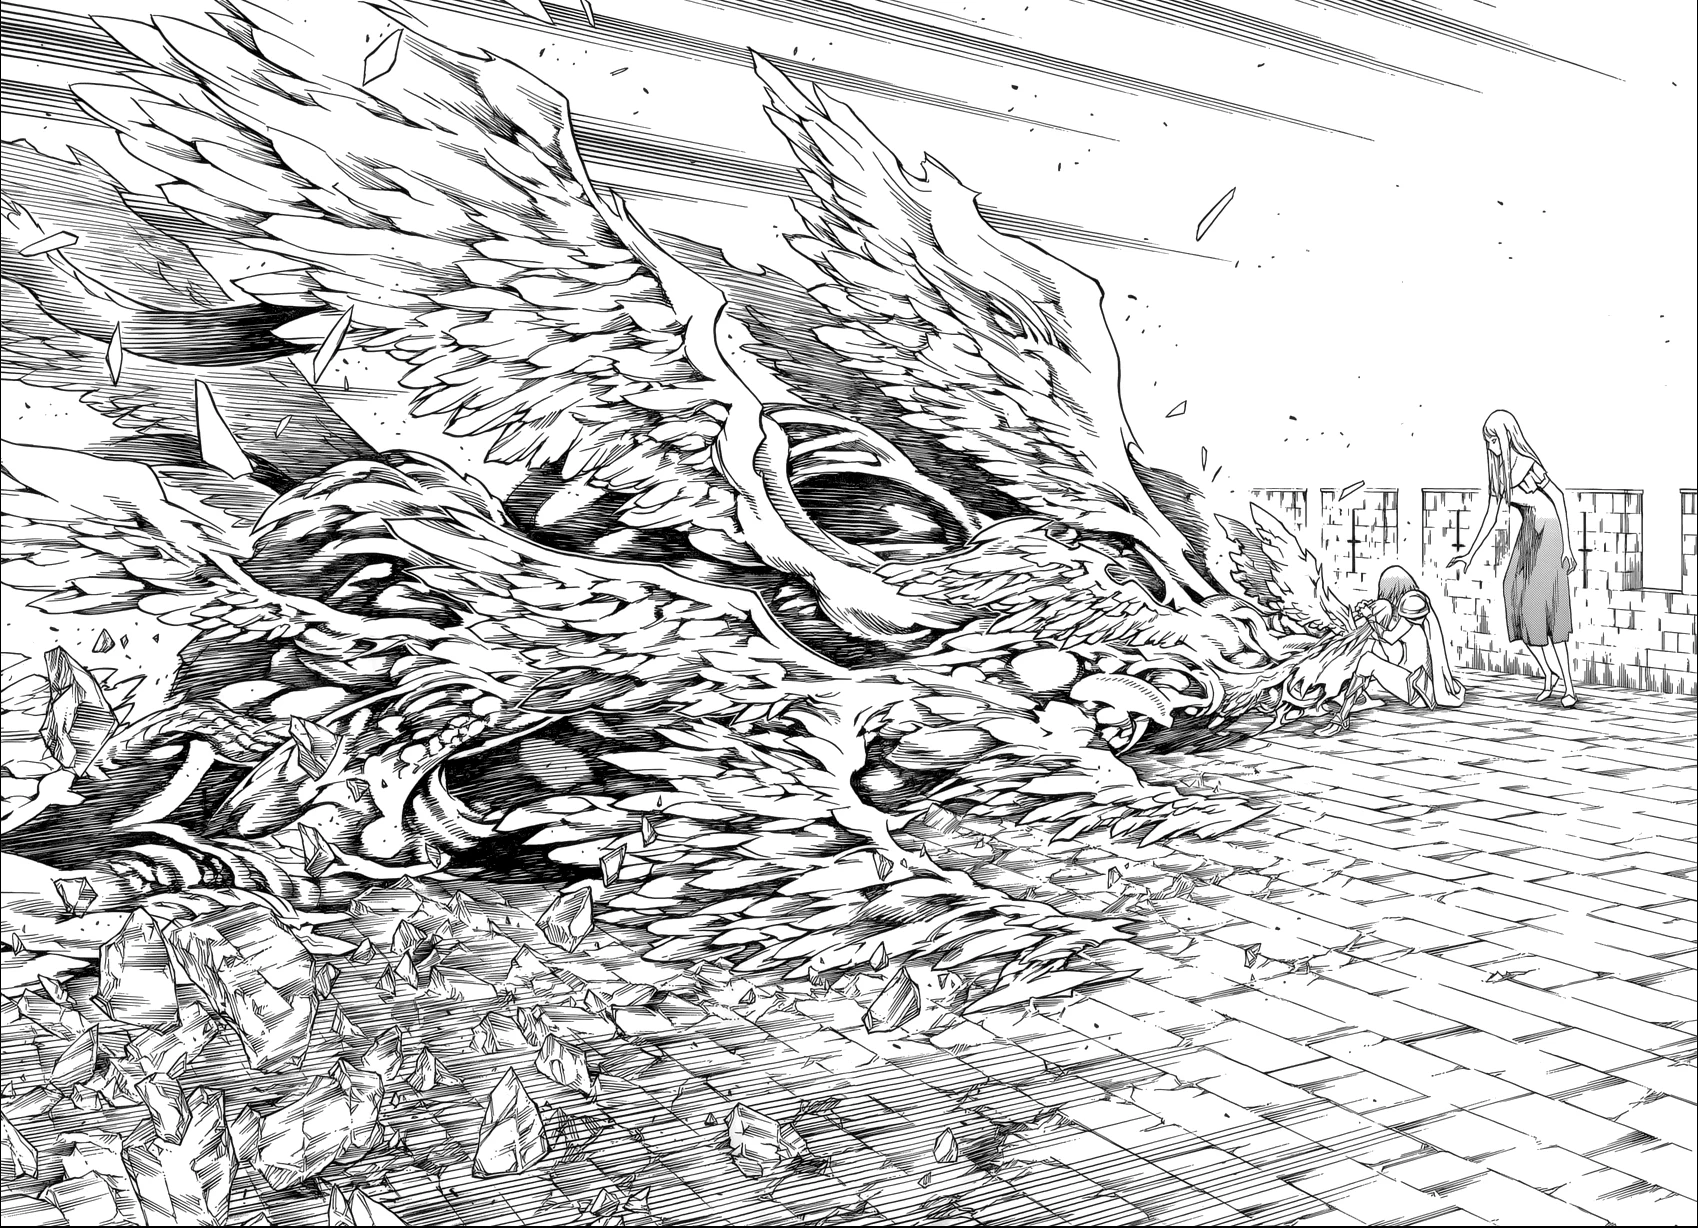
Galatea checks in with Clarice and Miata and confirms they are ready. Galatea instructs Clarice to keep her Yoma energy synchronized with Miata's. Galatea compares their role with Beth, keeping a fully awakened Alicia under control. She offers Clarice a chance to flee the city with Miata, but Clarice wants to stay and protect the people of Rabona.[50] Miata awakens into a sprawling, winged angelic form.[51]
Miata awakens into a feathered form as Galatea and Clarice struggle to hold on to Miata's human consciousness, despite the chaos in Miata's heart. Meanwhile across the city, Europa spots the huge winged body sprouting from the tower.[52]
Three diversions
Diversion I
Europa senses Miata's aura as well as those of the two warriors' struggling to align themselves with the near out-of-control energy.[53]
As Europa makes for the tower, the Next Generation warriors run interference. Suddenly Rafutera directs Europa into Anastasia's hairs, causing Europa to trip and crash into a roof. On a lower roof below, Rachel uses her Strong Sword to cut Europa's wire saw arms. Audrey and Dietrich also divert Europa's attention from the tower.[54]
Diversion II
Europa instantly regenerates her arms but faces all the single-digits of the Next Generation. Europa destroys the roofs beneath their feet and they become midair targets. As she attacks Rachel and Nina, Anastasia's hairs and Rafutera's Yoma power harmonization causes the tentacles to miss their targets.[55]
Diversion III
In frustration, Europa tries to attack the two. But the double-digits, in a repeat of Helen's moves against the awakened Hysteria at Organization Headquarters, destroy the city rooftops in an apparent effort to cause Europa to lose her footing. Europa anchors her arms into the ground.[56]
Trap
Audrey finally admits her and her comrades' efforts were only a diversion. Miata ambushes the standing target from behind. Miata has fully awakened into a plumed, multi-winged dragon-worm.[57]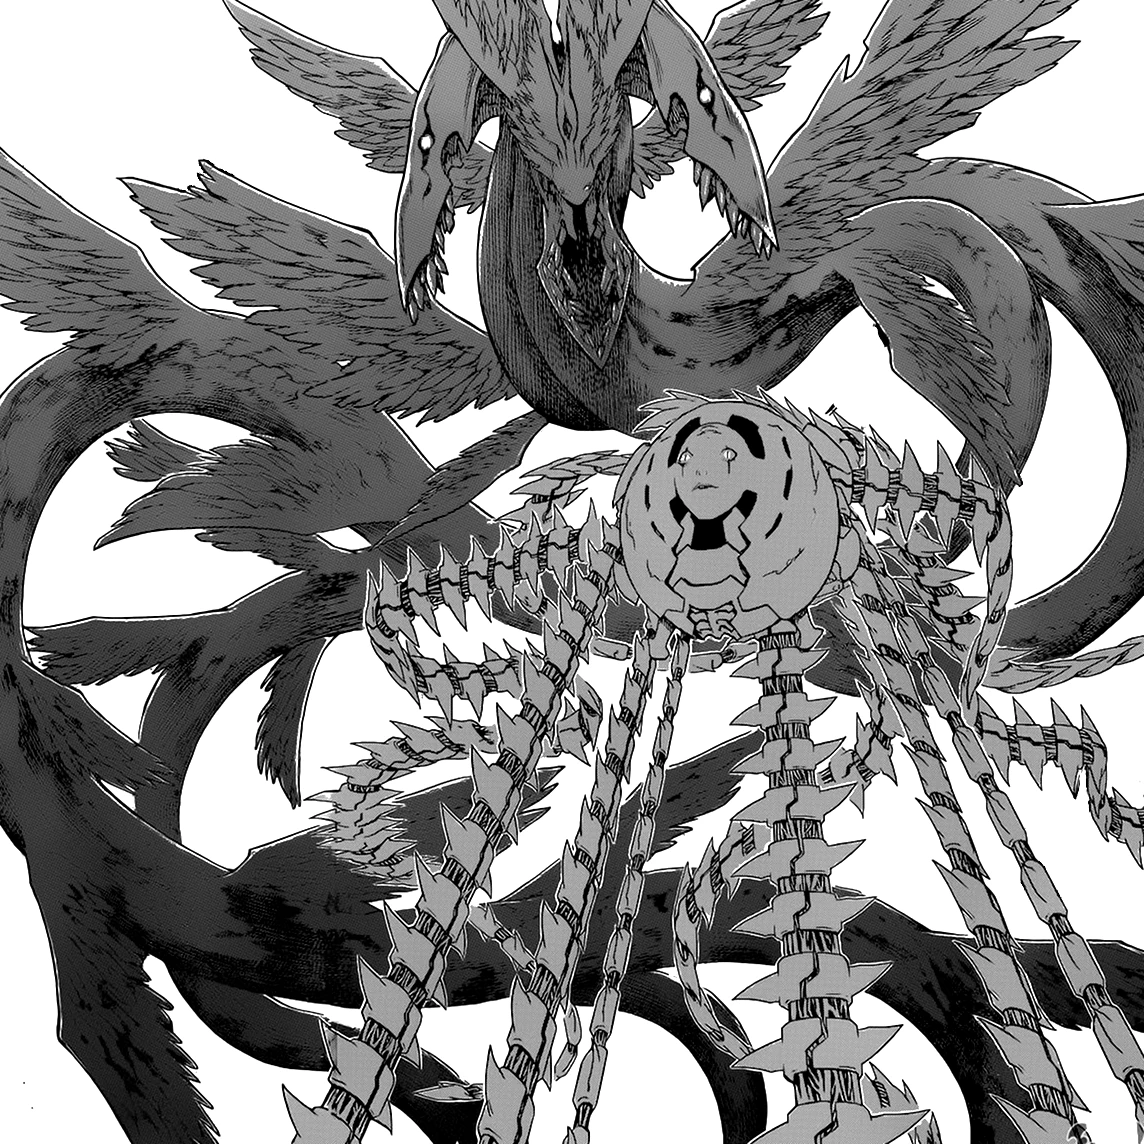
The plumed serpent versus the brittle-star
Round I
Urban warfare
Miata's three wing-like “jaws” fire teeth as if they were Yoma rods. Europa uses her wire saw-like arms to deflect the barrage. When Europa tries to strike, she gets thrown back and crashes into the building roofs below. Miata's counterattack causes the cursing Europa to escape down a street.[58]
The spectators are amazed at Miata's performance. Audrey states that Miata's original power rivaled No. 1s of the past. But she also questions whether or not Galatea and Clarice can really control Miata and bring her back to human form.[59]
In a series of hit-and-run attacks, Europa saws off Miata's wings. When Miata tries to counterattack, Europa bounces away down the narrow streets, ricocheting against the walls and pavement, as if she were a "pinball."[60] Then she attacks Miata again. Rachel and Audrey are dismayed by Europa's street fighting tactics.[61] The entire city has become a sort of pinball playfield for Europa.
Controllers
Atop a tower, Galatea and Clarice try to guide Miata's fully awakened form. But as Miata and Europa fight, Galatea realizes they are losing control.
While Galatea is unaffected, each time Miata is damaged by Europa, the damage is transferred to the weaker Clarice, who is bleeding from the orifices of her face. Any further damage to Miata may be terminal for both her and Clarice.[62]
Missing the target
Despite Miata regenerating her lost appendages, Europa keeps cutting them away. Miata's barrages keep missing their target as Europa artfully dodges the rain of teeth. The teeth begin to hit the ramparts where the warriors and guards watch. At first everyone thinks the teeth are missing Europa, but Audrey realizes that Miata is aiming at the guards.[63]
Galatea and Clarice have lost control of Miata, who begins to fully awakened. Extreme hunger is overtaking her human self. Her tentacles impale two of the guards and is about to eat them. When Audrey protests, Miata fires a barrage at the rampart.[64]
Europa gloats at the situation and begins to feed on the guards herself. Meanwhile on the tower, Clarice collapses. Back at the rampart, Anastasia and Dietrich try to counterattack, but Europa easily cuts them down.[65]
Europa feeds on the guards, while Audrey tries to scold Miata out of eating her two guards. At the tower, Galatea watches helplessly as Clarice deliberately awakens, which catches even Miata's attention.[66]
References
Tankōbon Claymore volumes cited are VIZ Media (en-us) editions, unless otherwise noted. Manga scenes (chapters) not yet translated cite Shueisha tankōbon (ja) editions. Manga scenes not yet published in tankōbon form cite Jump SQ (ja) editions. Fragments of Silver Omnibus (総集編 銀の断章 Gin no Danshou) 1–3, Shueisha, are only available in Japanese. Anime scenes (episodes) cited are FUNimation (en-us) editions, unless otherwise noted.
- ↑ Claymore 12, Scene 68, p. 142
- ↑ Claymore 12, Tokyopop, Scene 68, p. 142
- ↑ Claymore 12, Ediciones Glénat España, Scene 68, p. 142
- ↑ Claymore 12, Glénat Édition Française, Scene 68, p. 142
- ↑ Claymore 12, Star Comics, Scene 68, p. 138
- ↑ Claymore 12, Daewon CI, Scene 68, p. 142
- ↑ Claymore 12, Ever Glory, Scene 68, p. 142
- ↑ Claymore 12, Shueisha, Scene 68, p. 142
- ↑ Fragments of Silver Omnibus 3, "Yoma War Record III," p. 731
- ↑ Fragments of Silver Omnibus 3, "Yoma War Record III," p. 731
- ↑ Claymore 12, Scene 68, p. 147
- ↑ Come What May Claymore forum, 13 June 2007
- ↑ Onemanga Claymore forum, 1 October 2008
- ↑ Jump SQ, August 2013, Claymore, Scene 140, pp. 611–612
- ↑ Claymore 15, Scene 82, p. 147
- ↑ Fragments of Silver Omnibus 3, "Yoma War Record III," p. 731
- ↑ Claymore 13, Scene 73, p. 116
- ↑ Claymore 13, Shueisha, Scene 73, p. 100
- ↑ Claymore 13, Scene 73, p. 100
- ↑ Jump SQ, August 2013, Claymore, Scene 140, pp. 597–599
- ↑ Claymore 12, Scene 68, pp. 144–150
- ↑ Claymore 13, Scene 73, p. 95–97
- ↑ Claymore 13, Scene 73, p. 123
- ↑ Claymore 13, Scene 73, pp. 124–125
- ↑ Claymore 14, Scene 74, pp. 12–15
- ↑ Claymore 14, Scene 74, pp. 18–21
- ↑ Claymore 14, Scene 74, pp. 22–25
- ↑ Claymore 14, Scene 75, p. 66
- ↑ Claymore 14, Scene 76, pp. 51–59
- ↑ Claymore 14, Scene 77, pp. 99–101
- ↑ Claymore 14, Scene 77, pp. 104–105
- ↑ Claymore 14, Scene 77, pp. 106–107
- ↑ Claymore 14, Scene 77, p. 119
- ↑ Claymore 14, Scene 77, p. 122
- ↑ Claymore 14, Scene 77, pp. 126–127
- ↑ Claymore 15, Scene 78, p. 13
- ↑ Claymore 14, Scene 78, p. 19–30
- ↑ Claymore 14, Scene 78, p. 34–37
- ↑ Claymore 15, Scene 79–Scene 80, pp. 52–77
- ↑ Claymore 15, Scene 80, p. 79
- ↑ Claymore 20, Scene 108, pp. 10–21
- ↑ Claymore 20, Scene 108, pp. 34–35
- ↑ Jump SQ, August 2012, Claymore, Scene 128, pp. 344–349
- ↑ Jump SQ, October 2012, Claymore, Scene 130, p. 409
- ↑ Jump SQ, October 2012, Claymore, Scene 130, pp. 410–411
- ↑ Jump SQ, November 2012, Claymore, Scene 131, pp. 367–369
- ↑ Jump SQ, November 2012, Claymore, Scene 131, pp. 373–375
- ↑ Jump SQ, November 2012, Claymore, Scene 131, pp. 390–391
- ↑ Jump SQ, July 2013, Claymore, Scene 139, pp. 842–845
- ↑ Jump SQ, July 2013, Claymore, Scene 139, pp. 845–847
- ↑ Jump SQ, July 2013, Claymore, Scene 139, pp. 848–849
- ↑ Jump SQ, August 2013, Claymore, Scene 140, pp. 597–599
- ↑ Jump SQ, August 2013, Claymore, Scene 140, p. 600
- ↑ Jump SQ, August 2013, Claymore, Scene 140, pp. 601–603
- ↑ Jump SQ, August 2013, Claymore, Scene 140, pp. 604–607
- ↑ Jump SQ, August 2013, Claymore, Scene 140, pp. 608–611
- ↑ Jump SQ, August 2013, Claymore, Scene 140, pp. 611–612
- ↑ Jump SQ, September 2013, Claymore, Scene 141, pp. 712–715
- ↑ Jump SQ, September 2013, Claymore, Scene 141, pp. 716–717
- ↑ A Product of Wasted Time review of Scene 141
- ↑ Jump SQ, September 2013, Claymore, Scene 141, pp. 718–722
- ↑ Jump SQ, September 2013, Claymore, Scene 141, pp. 722–723
- ↑ Jump SQ, September 2013, Claymore, Scene 141, pp. 724–726
- ↑ Jump SQ, September 2013, Claymore, Scene 141, pp. 727–729
- ↑ Jump SQ, September 2013, Claymore, Scene 141, pp. 730–732
- ↑ Jump SQ, September 2013, Claymore, Scene 141, pp. 733–738