| Hilda | |
|---|---|
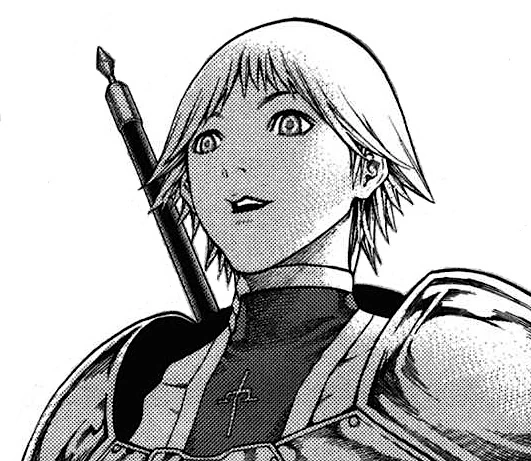 Hilda from manga
| |
|
VIZ Media name |
Hilda[1] (en-us |
|
Variant |
Hilda[2][3][4][5] (de |
|
Original name |
ヒルダ[7] Hirudu |
|
Rank No. |
6 of the Current Generation[8] |
|
Status |
Awakened, killed by Miria |
|
Ties |
Organization |
|
Class |
Offensive:[9] unknown ability |
|
Technique |
Unknown |
|
Quote |
Can you see me, Hilda?[10] |
|
Anime voice |
Colleen Clinkenbeard (en-us), |
|
First appearance |
|

Etymology[]
ヒルダ transliterates from "Hilda," from medieval German element hild (battle). Or from "Hildegard." Name of 7th century English saint, St. Hilda.
Appearance[]
Human[]
Hairstyle: razor-cut boy shag, similar to Clarice and several Battle of the North warriors.[11] Tomboyish face resembles Rafaela and Clarice. The anime Hilda differs in conception and resembles the US actress, Anne Francis.
Awakened[]
Manga[]
Mummy form, with wrap-like tentacles. Passive as an awakened being, keeping with her promise to Miria to "team up together as single-digit warriors."[12]
Awakened Hilda from manga
Similar to Agatha's second awakened form.[13]
Anime[]
Rooster-like form. More aggressive than the manga version.[14]
Hilda profiles in anime
Personality[]
As Miria's mentor, appears both friendly and helpful in guiding Miria's career path.
In Chaldean Numerology, the number 6, Hilda's number, is often viewed as the number of maternal care.
Datasheet[]
Claymore warrior[]
Class[]
Hilda is an offensive type[15] warrior. Having no Organization datasheet as a warrior in the "Yoma War Record," her ability and baselines are unknown.
Awakened[]
From "Yoma War Record II."[16]
Baseline[]
|
|
History[]
Early life unknown.
Hilda's hunt[]
Daytime in unknown locale. The leader of a hunt, Hilda, compliments Miria on her performance. Hilda vows to "team up together again as single-digit warriors."[17]
Phantom[]
Another day. From afar, a Man in Black observes Miria destroy a Yoma pack.[18]
He notes Miria's "Phantom" technique. Also watching is warrior No. 4, Ophelia. Though part of the hunt, she refuses to participate as no awakened being is present.[19]
Ophelia's plan[]
The manga and anime diverge here.
Manga[]
Two versions[]
There are two manga versions. The earlier version has Miria leading the hunt. In this version, Ophelia is not a hunt member. When Miria nearly kills the awakened Hilda and discovers Hilda's identity, Miria nearly awakens herself. Ophelia comes out of nowhere and waits eagerly for Miria to awaken so she can fight and kill Miria.
In the later manga version in Extra Scene 2, Miria is now part of a hunt led by Ophelia, who speaks of a warrior who gave Ophelia a black card. But instead of giving it to the unnamed recipient, Ophelia tore it up.[20]
Non-fight[]
On a mountain, the party engages the awakened being, mummy-like with tape-shaped tentacles. The awakened acts strangely passive. Ophelia disables the awakened. Miria finally beheads it, while noting the awakened's suppressed Yoma aura. Miria now realizes the awakened's identity—Hilda.[21]
Miria realizes that Hilda allowed herself to be killed, echoing Hilda's earlier words "to team up together again..." In her grief, Miria awakens herself, with Ophelia waiting to kill her.[22]
Anime[]
In anime version, Miria leads the hunt as in the earlier manga version. Again, after nearly killing Hilda, who then dies, Miria awakens. Ophelia, who is not part of the hunt, comes out of nowhere and waits for Miria to awaken so she can fight and kill Miria.[23]

Hilda dying during Ophelia's hunt
Aftermath[]
7-year timeskip[]
After the Ghosts leave Alfons, Helen finds Hilda's sword one rainy night. The next morning, back on the same mountain where Hilda died, Miria plants the sword as a grave-mark. She speaks to Hilda's spirit, asking her to join Miria, the and fallen warriors of Pieta.[24]
Rebellion[]
In Rabona, Miria paralyzes Tabitha, then puts on her old Claymore uniform and leaves. Miria journeys to Organization Headquarters, where she paralyzes the entire warrior contingent. But during her combat with the Twin Trainees, an anti-Claymore warrior, Rafutera, uses Yoma power harmonization to cause Miria to hallucinate her old friend Hilda.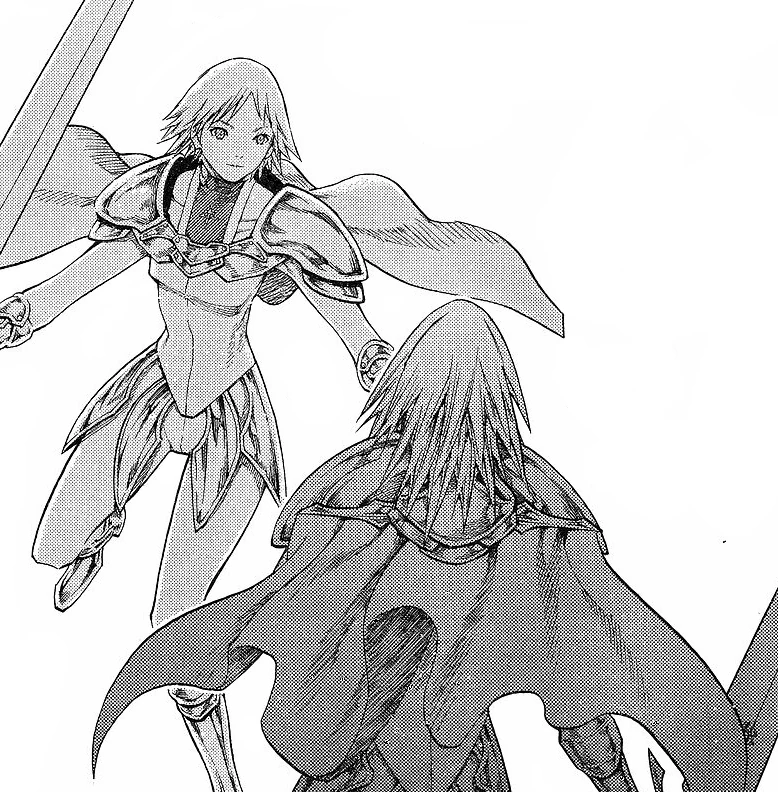
"Hilda" returns
Later, during the Rebellion, while Miria combats Hysteria, Miria reminisce about "Ophelia's plan" to kill both Hilda and herself.[25]
Additional details[]
Video[]
- Japan version of Hilda dying during Ophelia's hunt
References[]
Tankōbon Claymore volumes cited are VIZ Media (en-us) editions, unless otherwise noted. Manga scenes (chapters) not yet translated cite Shueisha tankōbon (ja) editions. Manga scenes not yet published in tankōbon form cite Jump SQ (ja) editions. Fragments of Silver Omnibus (総集編 銀の断章 Gin no Danshou) 1–3, Shueisha, are only available in Japanese. Anime scenes (episodes) cited are FUNimation (en-us) editions, unless otherwise noted.
- ↑ Claymore 13, Extra Scene 2, p. 160
- ↑ Claymore 13, Tokyopop, Extra Scene 2, p. 160
- ↑ Claymore 13, Ediciones Glénat España, Extra Scene 2, p. 160
- ↑ Claymore 13, Glénat Édition Française, Extra Scene 2, p. 160
- ↑ Claymore 13, Star Comics, Extra Scene 2, p. 156
- ↑ Claymore 13, Ever Glory, Extra Scene 2, p. 160
- ↑ Claymore 13, Shueisha, Extra Scene 2, p. 160
- ↑ Fragments of Silver Omnibus 2, "Yoma War Record II," p. 730
- ↑ Fragments of Silver Omnibus 2, "Yoma War Record II," p. 730
- ↑ Claymore 13, Extra Scene 2, p. 189
- ↑ Claymore 13, Extra Scene 2, p. 160; Claymore, Anime Scene 11
- ↑ Claymore 13, Extra Scene 2, p. 162
- ↑ Claymore 15, Scene 78, pp. 20–29
- ↑ Claymore, Anime Scene 11
- ↑ Fragments of Silver Omnibus 3, "Yoma War Record III," p. 730
- ↑ Fragments of Silver Omnibus 2, "Yoma War Record II," p. 693
- ↑ Claymore 13, Extra Scene 2, pp. 160–162
- ↑ Claymore 13, Extra Scene 2, p. 166
- ↑ Claymore 13, Extra Scene 2, pp. 166–167
- ↑ Claymore 13, Extra Scene 2, pp. 169–172
- ↑ Claymore 13, Extra Scene 2, p. 184
- ↑ Claymore 13, Extra Scene 2, pp. 184–185
- ↑ Claymore, Anime Scene 11
- ↑ Claymore 13, Extra Scene 2, p. 188
- ↑ Claymore 21, Scene 118, p. 158