| Clare | |
|---|---|
 Clare
| |
|
VIZ Media name |
Clare[1] |
|
Variant |
Clare[2] |
|
Original name |
クレア[12] Kurea |
|
Rank No. |
47 of the Current Generation[13] |
|
Current status |
Manga: alive, with Raki and Ilena at Ilena's mountain house |
|
Ties |
Organization, Paburo hunt, Ghosts, Holy City of Rabona |
|
Class |
|
|
Technique |
|
|
Quote |
From the moment I first saw you, you've looked so sad. Your face shows so much pain. Your eyes are like mine. You looked so sad, so hurt, so lonely...as if you couldn't stand it.[18] |
|
Anime voice |
Ann Vielhaben (adult de |
|
First appearance |
|
Etymology[]
The original Japanese Claymore name derives from either the French feminine first name "Claire" (French for "clear" or "light"), or the Anglo-Irish last name "Clare" (deriving either from Latin clarus, meaning "famous" or "bright," or the English town, Clare).
"Claire"[]
The earliest romanization of クレア is "Claire" in the Star Comics (it) edition of Claymore in June 2005. By far the most common romanization, "Claire" also appears in the France, Indonesia[19] and Spain editions. See the panels below from the Mexico edition[20] for example.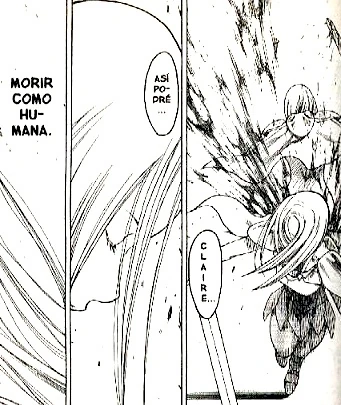
"Claire" in the Mexico edition
The Yamato Video dub pronounces "Claire" in both the traditional ![]() and modern Italian
and modern Italian ![]() . Name of the Italian saint, Clare of Assisi.
. Name of the Italian saint, Clare of Assisi.
A month before the release of the first VIZ Media tankōbon, the "Claire" spelling appears in the March 2006 Shonen Jump, US edition.[21]
"Clare"[]
Despite the earlier use of "Claire" in Shonen Jump, VIZ Media switches to "Clare" with the 4 April 2006 release of Claymore 1.[22] Due to the widespread use of the VIZ Media translation for non-English scanlations, "Clare" is the usual spelling in scanlations using the Roman alphabet. Currently, only the Germany and US editions use "Clare."
In 2007, the "Clare" spelling reappears on section two[23] of a 3-part composite poster in the Japanese language Fragments of Silver Omnibus series. It repeats the VIZ Media translation of Scene 39: "I am Clare, No. 47. I've taken on Teresa's flesh and Ilena's right arm."[24]
Appearance[]
Pre-Claymore[]
Angel Densetsu[]
Clare appears as a taller, medieval version of "Ikuno Shirataki",[25] a high school student in Norihiro Yagi's earlier series, Angel Densetsu.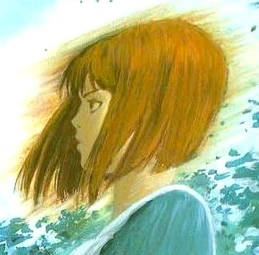
Ikuno of Angel Densetsu
Berserk[]
In an apparent homage to Berserk, Ikuno herself is modeled after the earlier "Colette," the young girl who befriends Guts in Chapter 2 of Kentaro Miura's series (1990).[26]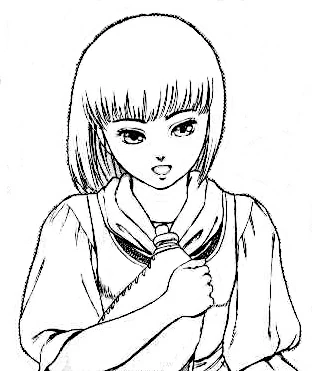
Colette of Berserk
Claymore[]
Childhood[]
Hairstyle: Hime—long and straight (colored brown in the anime), with bangs on the forehead.
Clare has green or gray eyes in the anime.[27] See "Clare comforting Teresa" video. Her eyes turn brown when Clare takes suppressant. As a young girl, she bears scars from Yoma abuse.[28]
Claymore warrior[]
Physical[]
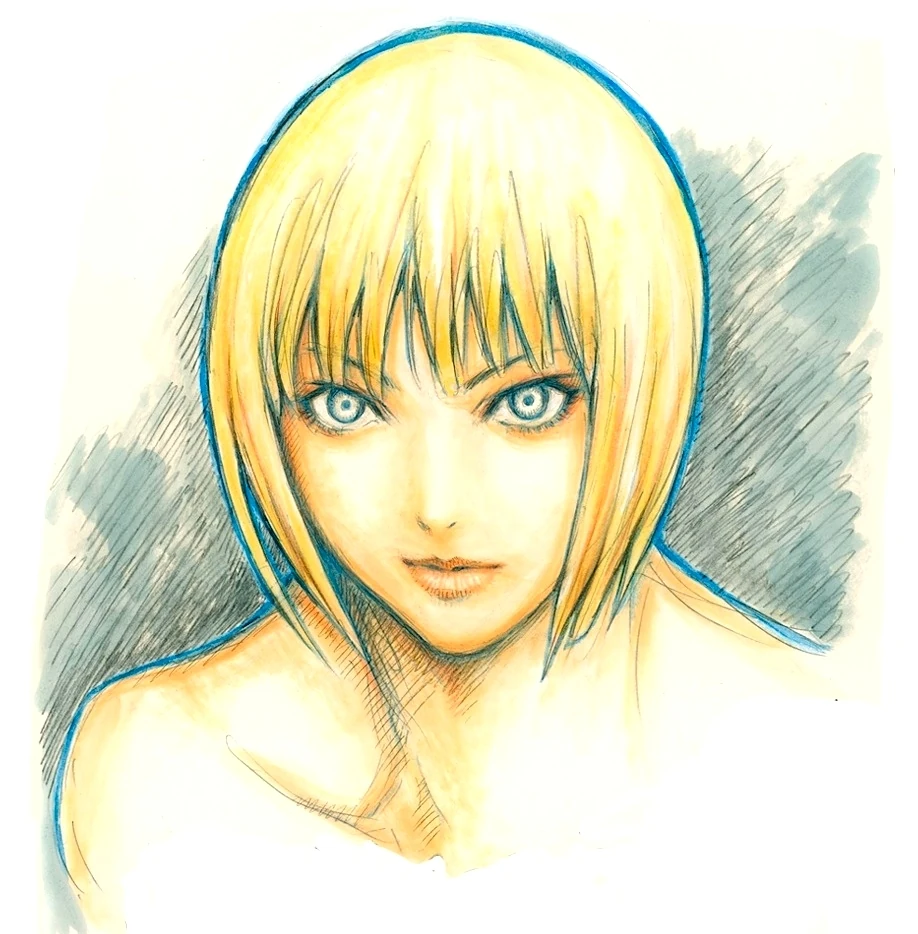
Hairstyle: pageboy, a classical cut common in manga and anime. Despite the repetition of hairstyles among the Claymore warriors, Clare appears to be the only warrior to wear a pageboy.
Clare has the typical Yagi heart-shaped face. Her irises are silver. Her abdomen bears an scar as a result of implanting the flesh and blood of Teresa throughout Clare's body as a child.[29][30]
Uniform[]
Old Generation uniform (circa Teresa Era) being worn during the Current Generation.
Clare wears an Art Deco, Roman Army-like uniform—pieces of armor worn over shirt and leggings. A dicky bearing Clare's symbol is worn over the throat.
Two layers of spaulders are fastened by a 2-band buckle. Attached to this array is a heavily built sword carrier, which a cape is fastened to a pair of horns. A truncate protective plate, similar to Teresa's, covers the seat of the faulds skirt in addition to the eight faulds or bands.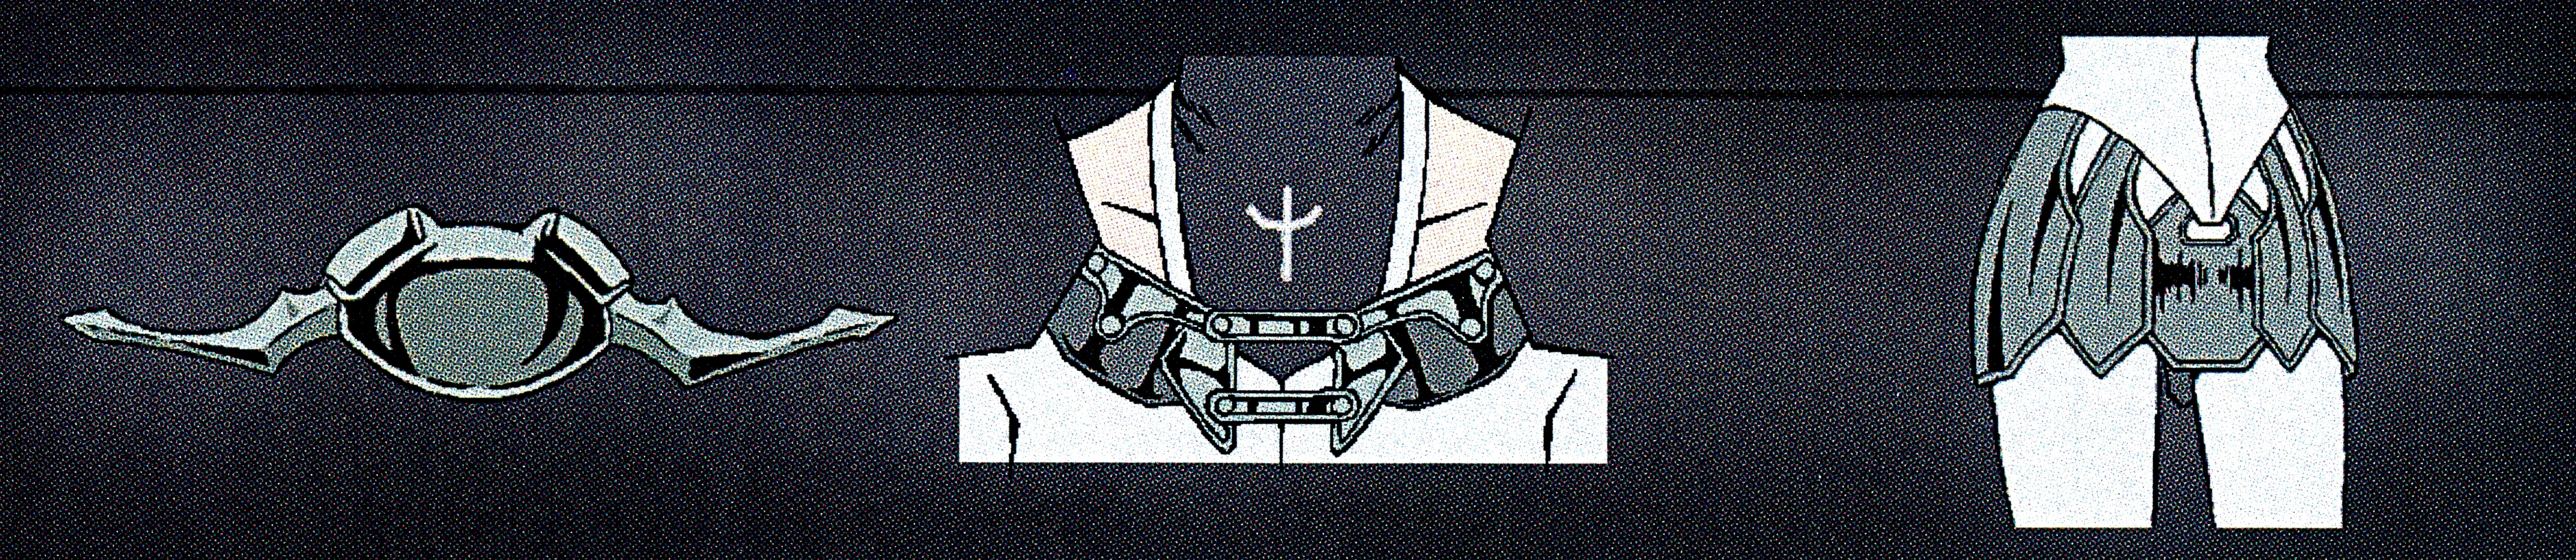
Clare's equipment
Unlike most Current Generation warriors, vambraces only cover Clare's wrists, while her old-school chausses fall well below the knees.
Not shown is a leather pouch, hidden beneath the cape, in which warriors carry money and other personal effects.
Ghost[]
During the 7-year timeskip, Clare replaces her Organization uniform with a "Zettai Ryouiki" look—light armor worn over black top, garters, gaped stockings and short skirt.
Closest to Cynthia in dress. Later in Scene 130, before engaging Cassandra, Clare appears in her old uniform.[31]
Awakened[]
Claymore warriors can voluntarily shapeshift. Clare's face and body becomes engorged with veins and muscle. Her eyes turn gold with vertical pupils like a cat's.[32]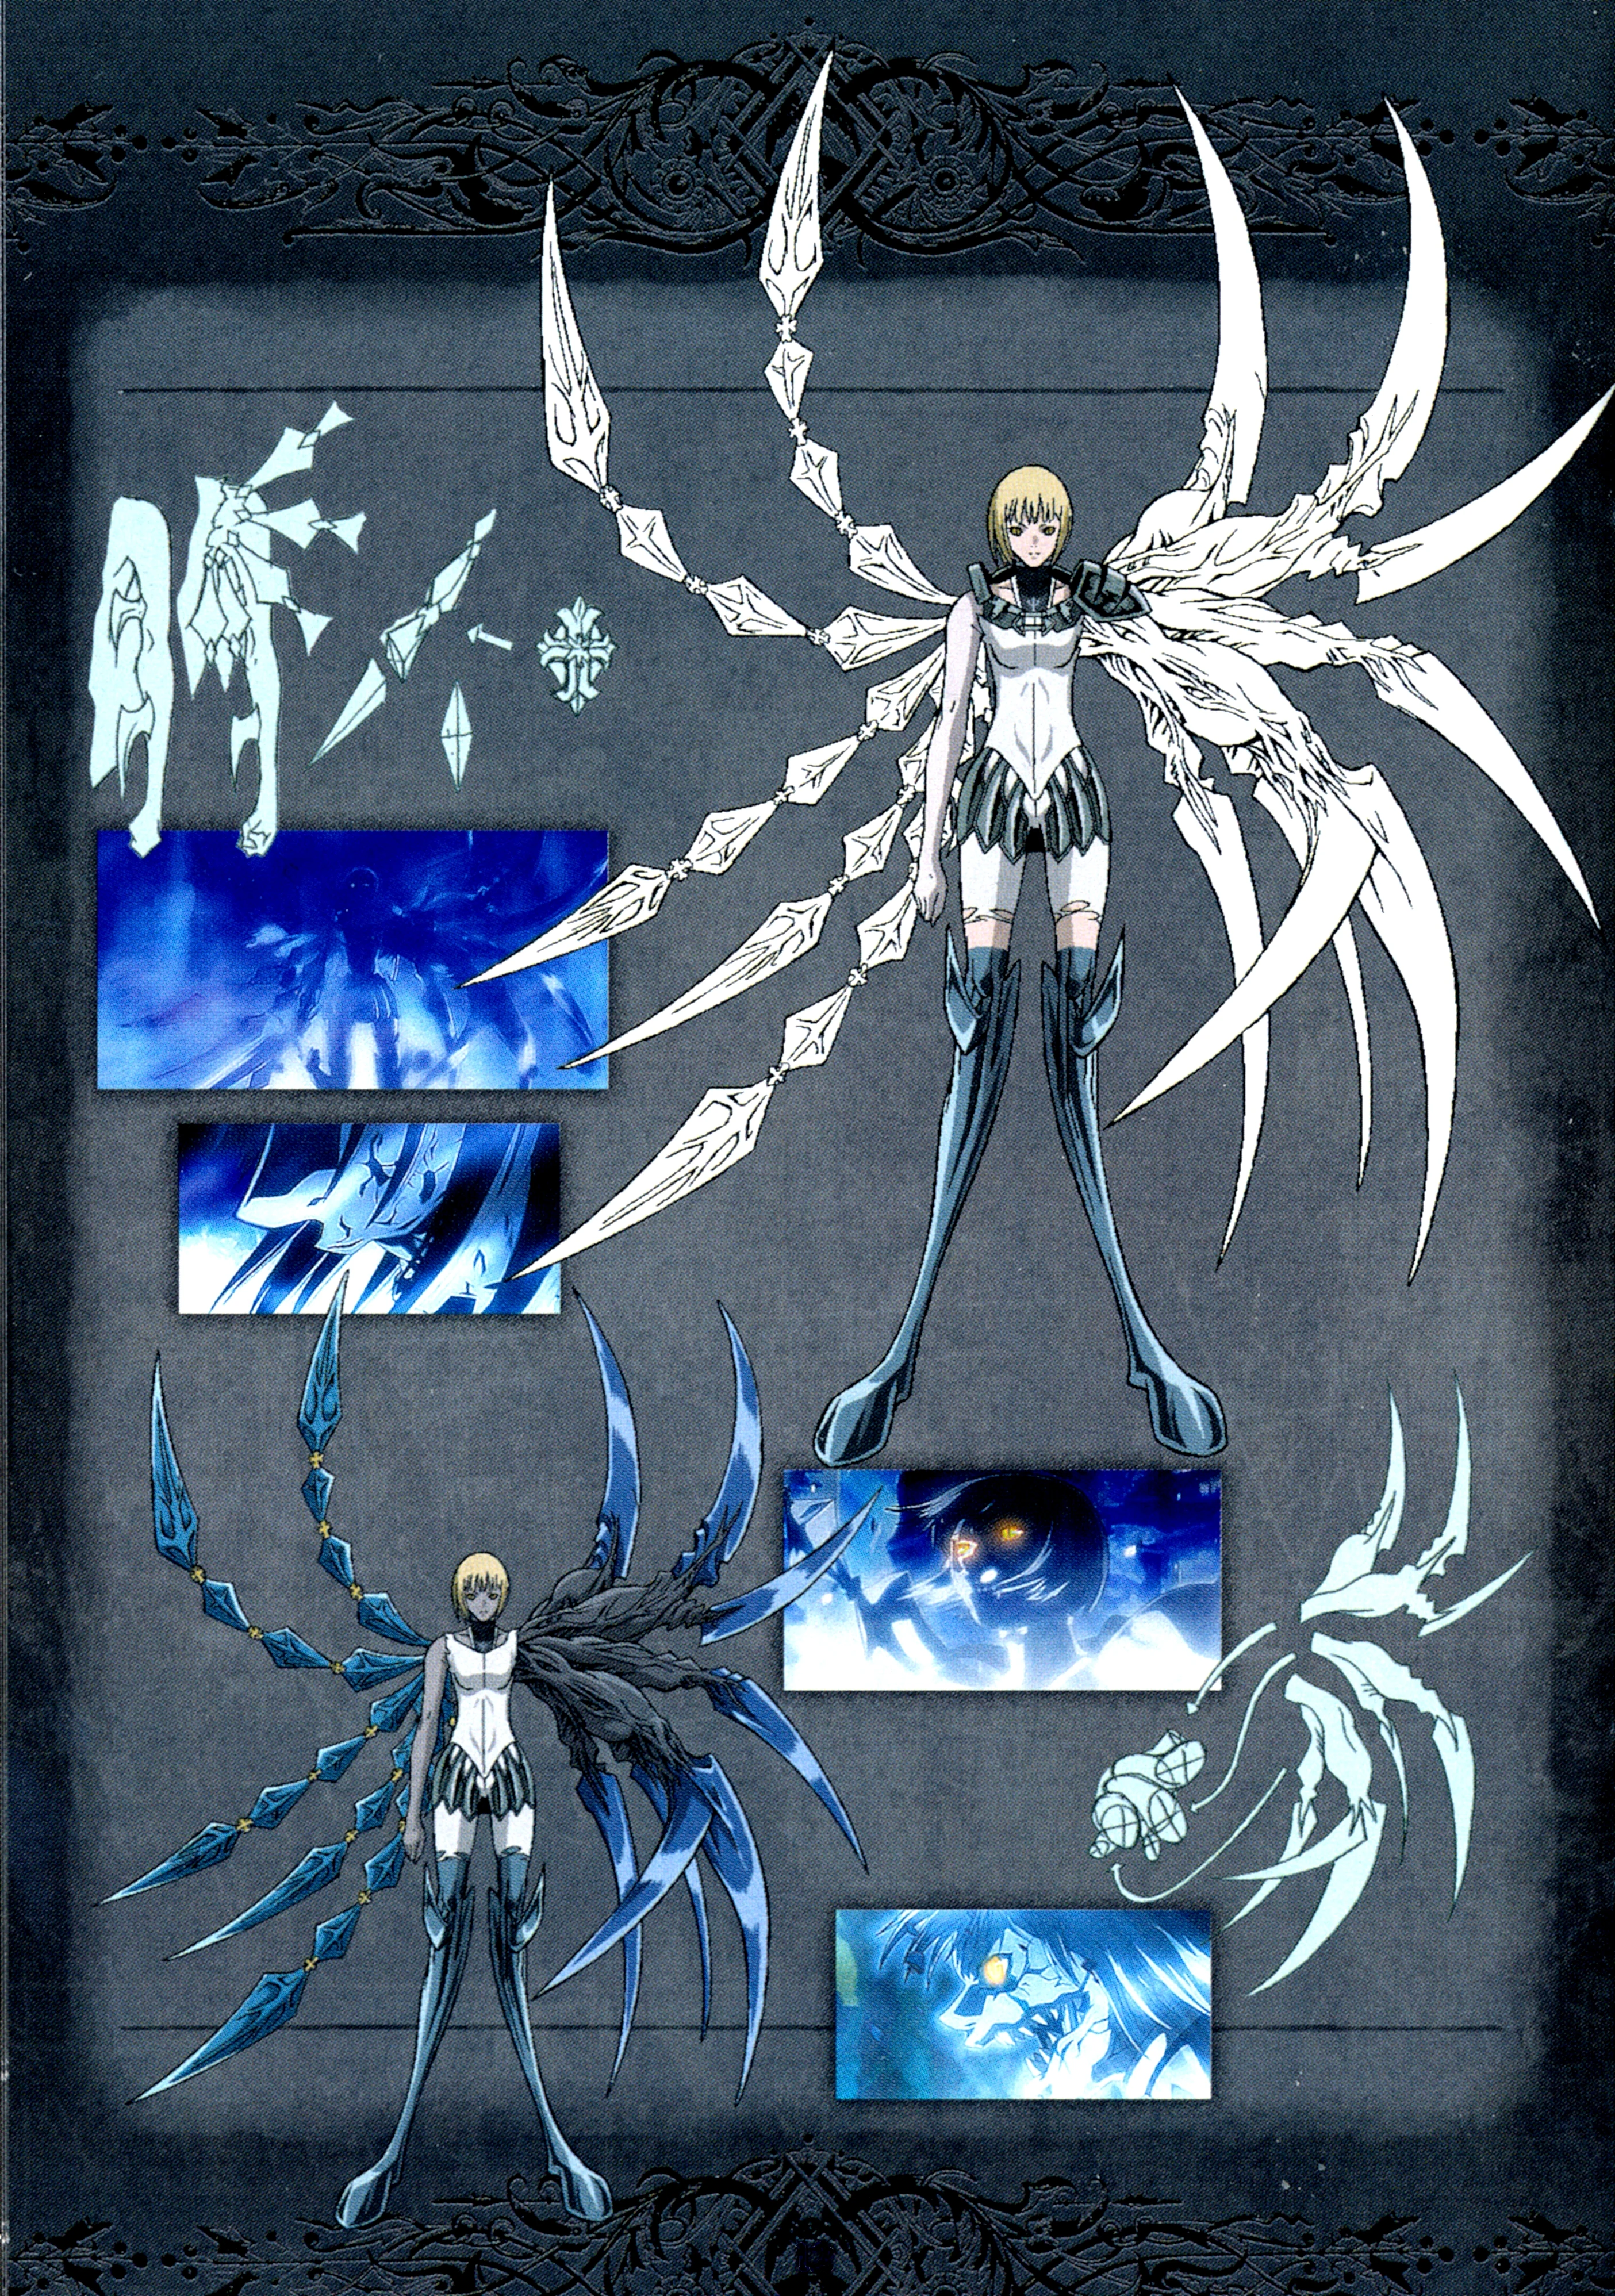
Anime proImages of Clare awakened
During the Battle of the North, Clare's legs becomes hock-jointed—a cross between a Pterodactyl and a horse. Her upper torso has a Swiss Army knife look—her left arm becomes a giant claw (and eventually just clawed tentacles [see image above]), which she uses to make sudden stops and turns.[33]
Personality[]
Childhood[]
As a pre-adolescent, Clare appears unusually persistent. She survives the destruction of her family, but ends up traveling with a Yoma.[34]
Emotionally withdrawn while captive, she opens up upon meeting Teresa.[35] But Clare withdraws again after Teresa's death.
Claymore warrior[]
Dual life[]
As an adult, Clare appears introverted. In reality, Clare keeps her emotional life a secret. In the Paburo Mountains, Galatea reports that Clare is emotionally shut down due to a tragedy in the past.
Rubel and Ilena also see through the facade. Both warn her of the consequences of an emotional life—the very sort of life Clare is willing to live and die for.
Half-awakened[]
This dual life is behind the phenomenon of the half-awakened. Rubel describes to Dae the ability to release Yoma energy to the point of awakening, yet being able to revert to normal. The four warriors who possess this ability have Yoma implants from a lost loved one (citation needed for the other 3 [+Jean] having flesh from Warriors).[36]
Dae says the emotional bond to the loved one is what enables greater control over the awakening process.[37]
Significance of 47[]
In most website references, 47, Clare's number, is thought to be symbolic of Okinawa, Japan 47th prefecture, the birthplace of Norihiro Yagi.
In Chaldean Numerology, the number 47 reduces to 11, the number of harsh childhoods and challenging adulthoods. But being late bloomers, 47 is also the number of inevitable, superhuman mastery when all seems lost.
Datasheet[]
The Organization baselines and assessment are based on data before the 7-year timeskip.
Baseline[]
Height: 170cm (5ft 6.92in).[38] Dominant arm: right[39]
|
|
Class[]
Clare is an offensive type warrior, her innate ability being Preemptive Sensing.[40]
Technique[]
Quicksword[]
Clare's possession of Ilena's right arm enables the use of Quicksword. For this arm's potential baselines, see Ilena's baseline.
Windcutter[]
During the 7-year timeskip, to avoid exposing her Yoma aura, Clare develops a Yoma powerless version of Windcutter.
Organization assessment[]
The Organization notes the low baseline of abilities. Appears calm, but too many instances being emotionally involved. Also reports of near awakening. Died during the Battle of the North, but her body is undiscovered.[41]
History[]
Childhood[]
Family[]
A flashback to her childhood shows that her parents are killed by an older, Yoma-infected brother. But an unknown Claymore warrior lops off his skullcap as he about to eat Clare. Afterward, locals are concerned that Clare is infected with Yoma.[42] Later, she is taken in by a pack of seven Yoma, who wander from town to town, seeking prey. Clare is part of their cover.
Teresa[]
Teo mission[]
Orsay assigns Teresa to on a mission to Teo village. But after finding no Yoma at Teo, Teresa shows up in a neighboring village, where she finds the Yoma pack. She initially kills six of the seven members.
Then she rescues Clare from the seventh Yoma, who poses as Clare's father. A mute Clare, seeing a kindred spirit, tries comforting Teresa, only to be rebuffed. Teresa leaves town. While Clare follows Teresa through wilderness, they run into a bandit gang—led by Boss—who Teresa frightens away by exposing her stigma.[43]
New old name[]
Despite her initial annoyance, Teresa becomes fond of Clare. She names her "Clare," only to find out that is her name. Teresa tells Clare about the twin goddesses, Teresa and Clare.[44]
After fighting Rig, Clare regains her voice and reveals seeing the same pain in Teresa's eyes as Clare suffers and only wants to comfort Teresa. Teresa and Clare become like mother and daughter.[45]
 </a>
</a>
Clare comforting Teresa
Rokut mission[]
They continue their travels together. But Teresa leaves Clare with foster family in Rokut. When Teresa realizes the bandits were only waiting for her to kill the town Yoma and leave, Teresa returns too late to save the village from bandits. She executes the entire gang.[46] Teresa breaks the cardinal rule of the Organization—never kill a human. Later she resists execution, when Orsay refuses to reveal Clare's fate. Teresa leaves with Clare.
Warriors No. 2–5 are sent to purge Teresa[47]
Teresa mission[]
At another village, Teresa saves a young boy from a Yoma. Despite Teresa's fears of rejection, the villagers urge Teresa to stay. Guests of honor at a local inn, Teresa and Clare spend their last moments of happiness together. Soon the mission arrives to purge Teresa.[48]
Teresa repels the first attacks of Ilena and Sophia, then escapes Noel's rear attack. Teresa and Clare land out on the street. Despite Teresa's sensing ability, she does not notice Priscilla, who introduces herself.[49]
One-by-one, Teresa defeats the four warriors. And without Yoma power release or specialized technique. Led by Priscilla, the purge team proves little more than an organized mob.[50]
Last combat[]
Teresa and Clare leave town. But Priscilla awakens and pursues them. On a deserted plateau, Priscilla fights and wounds Teresa.[51]
The Purge team arrives, who witness the ongoing fight. Teresa finally releases her Yoma power, but only at 10%. But despite defeating Priscilla, Teresa refuses to behead her. When Teresa drops her guard, Priscilla beheads her.[52]
Aftermath[]
Priscilla fully awakens into the winged, "One-horned monster."[53] She cuts off Ilena's arm, then kills Sophia and Noel, despite Noel cutting off Priscilla's arm. Priscilla again attacks, leaving Ilena for dead.[54]
But Priscilla ignores Clare, who despises herself for being afraid. Priscilla then flies off to parts unknown. Clare decides to use Organization as venue for revenge.[55]
Organization[]
Early days[]
Cradling Teresa's head, Clare searches the village, where finds her second mentor: Rubel, who helps her join the Organization. She insists that Teresa's flesh and blood be put into her.[56] Despite Rubel's jump-starting Clare's career, their relationship remains a chilly one. His double-dealings anger Clare.[57]
School[]
As a trainee, Clare's only friend at school is Elena. During their painful transformation, they could only sleep by embracing each other.[58] Elena is sometimes confused with a much bigger and muscular rival, who terrorizes Clare at school.[59]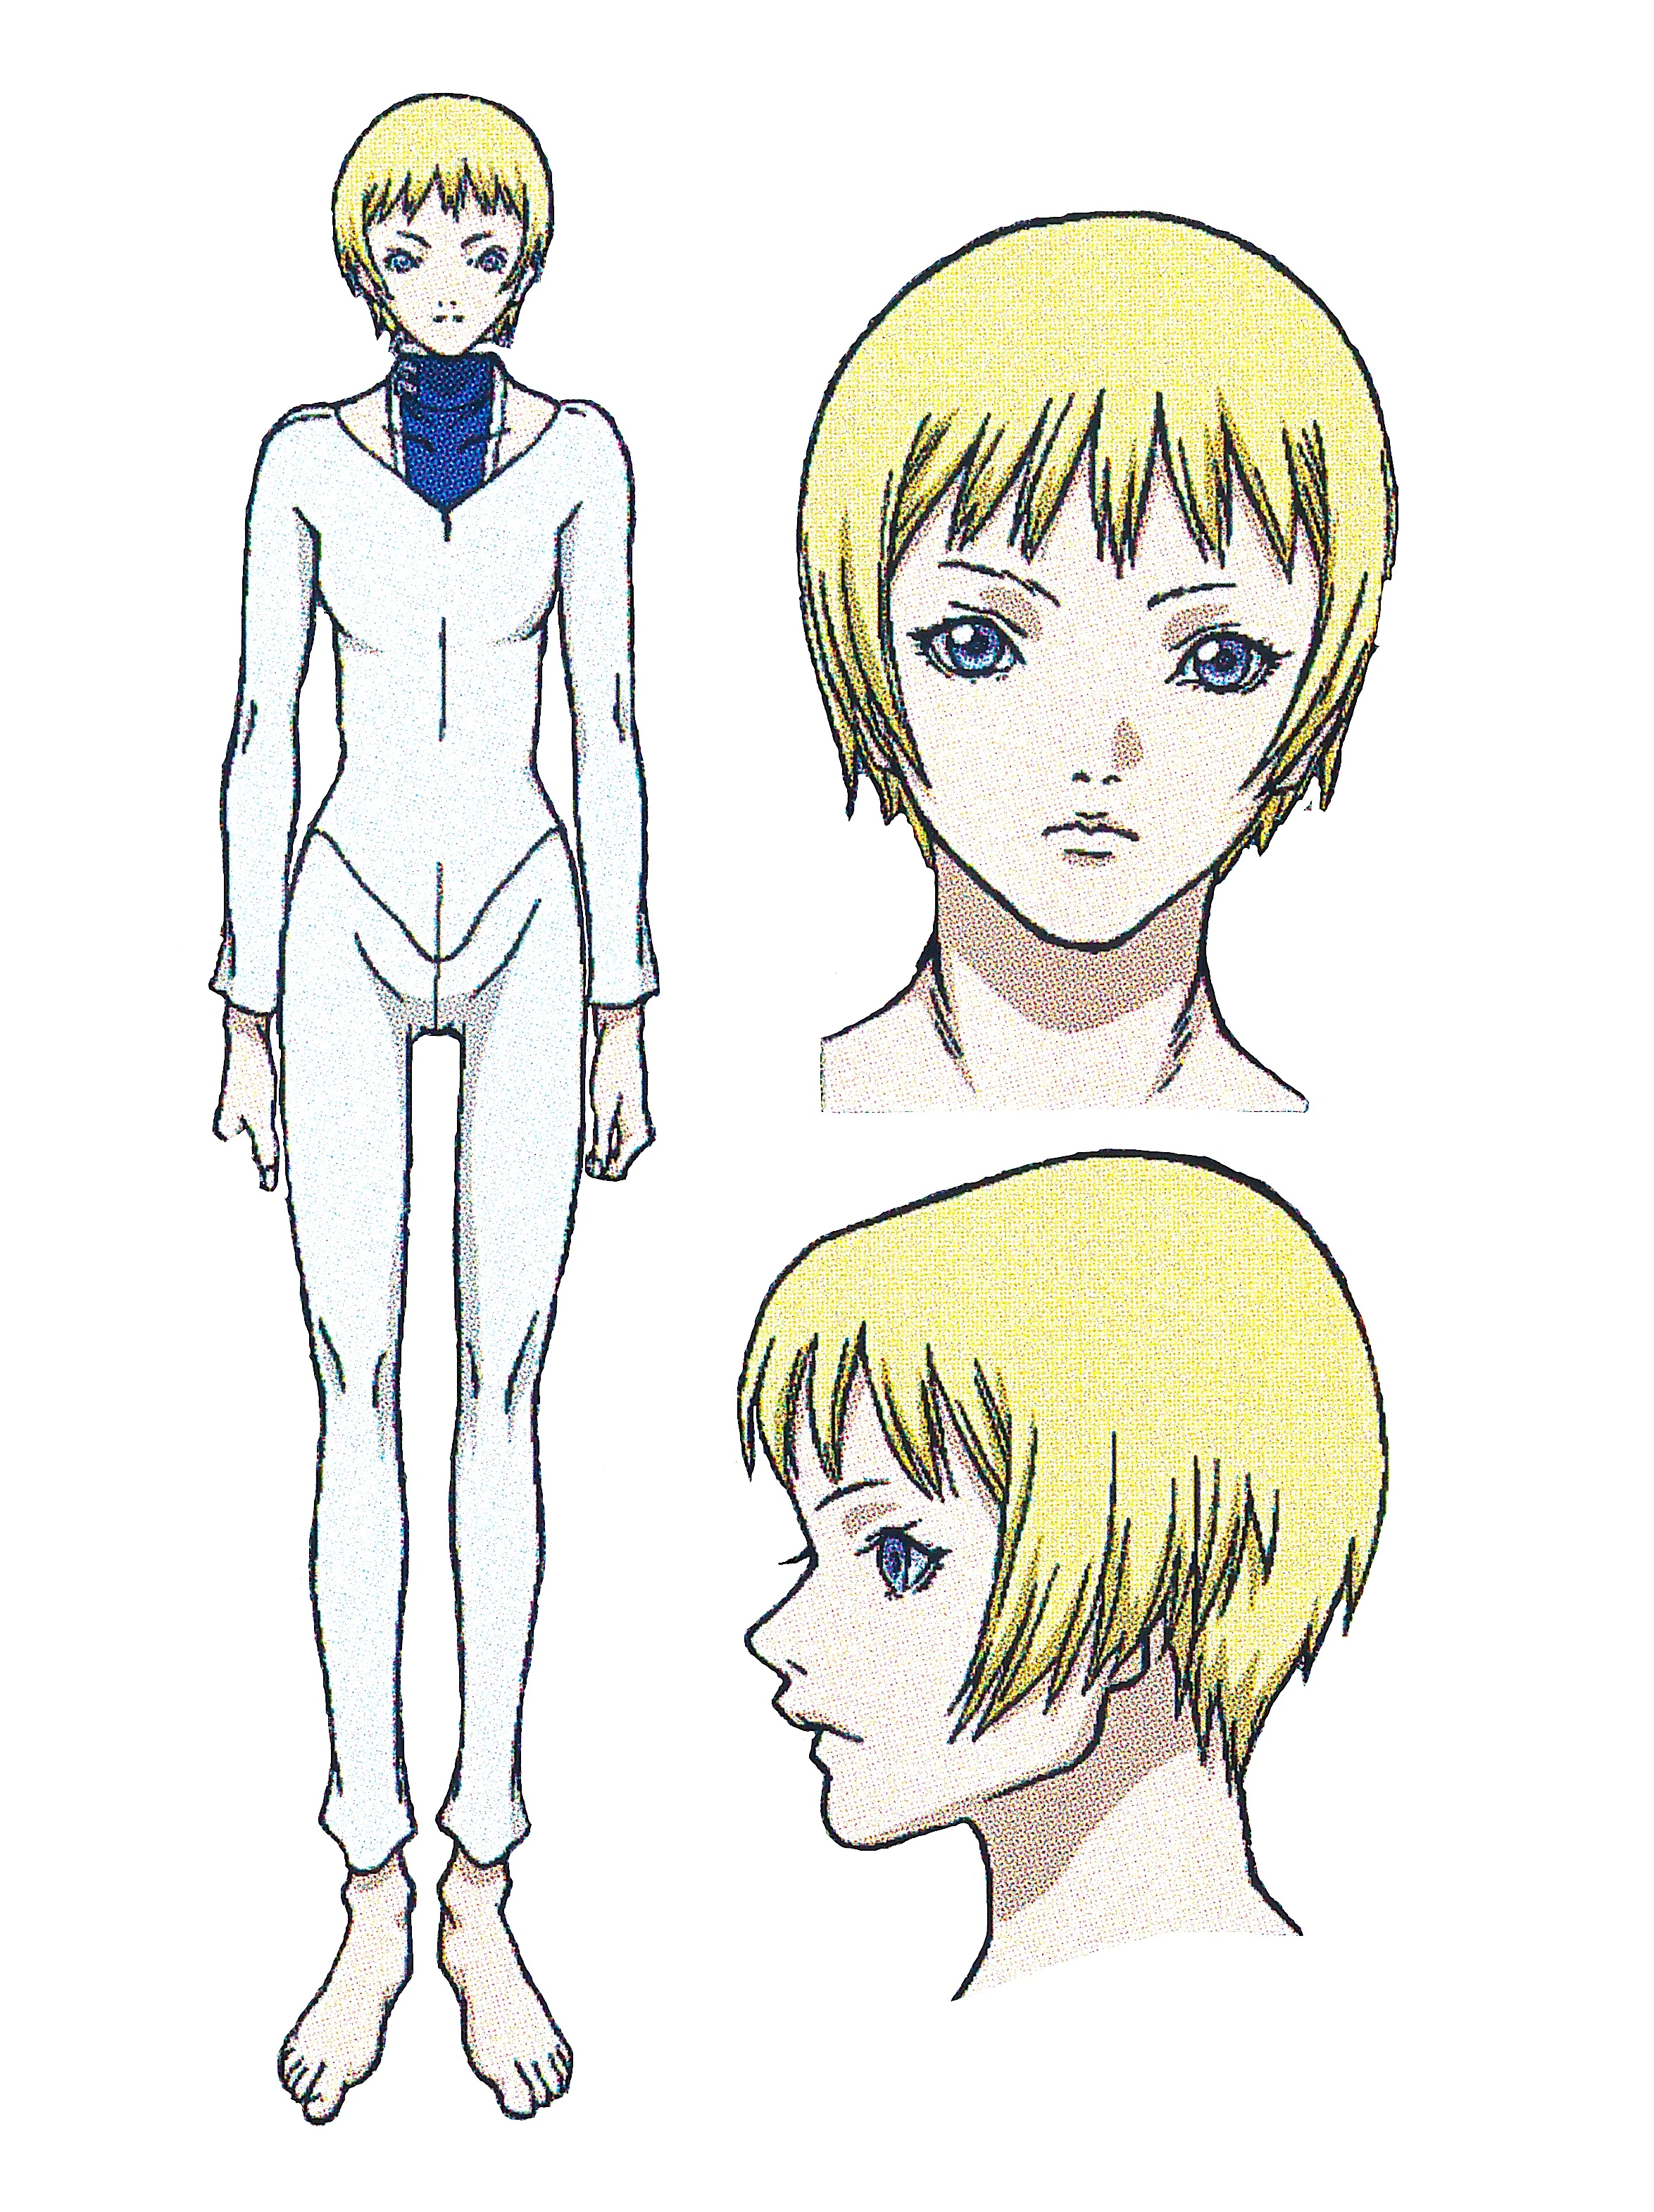
Studio proImages of Clare as trainee
Final exam[]
In a ruined village, ten trainees are given their final exam. In the ruins, Clare and the rival trainee continue their feud begun earlier. But they discover their teammates dead. Then an attacking Yoma forces them to cooperate.
Clare hides her wounded companion and herself inside a building. Clare cuts off 2/3 of her hair to hang out the window as a decoy. When the Yoma attacks the hair, Clare comes up from behind and kills the Yoma.[60]
Novice warrior[]
Clare is assigned the lowest rank—No. 47. Her district is in the western region of Lautrec. The series begins when she goes on the Doga mission.
Doga mission[]
Nighttime in the forest. Clare confronts and kills a Yoma before reaching Doga village.
In Doga, the inhabitants are terrified of Clare. Clare smells a Yoma behind her and swings her sword. But she stops in time. Is only a young boy. She allows him to follow her around, hoping that he will lead her to the Yoma. When he says his name is Raki, Clare refuses to give her name.
Raki returns home to cook dinner, but finds his uncle's body. His Yoma-infected brother, Zaki, is about to eat Raki. But Clare bursts through the ceiling and bisects the Yoma.[61]
In the anime, Clare rescues Raki from the desert, when Raki is exiled from Doga.[62] In the manga, the rescue occurs after the Strah mission.[63]
Strah mission[]
Manga[]
As Clare bathes at a waterfall, a bespectacled Man in Black, Rubel, advises that she can never wash off the Yoma scent, since her own body produces it.[64] Possibly alluding to the unhealable stigma.
He gives a new assignment—the village of Strah. When Clare arrives, the villagers remain hidden behind closed doors. But a man meets her in the street. Then four Yoma surround her.[65] Then he mentions a fifth Yoma. Suddenly from the sky, a Winged Yoma strikes.[66]
Clare hacks apart three Yoma. She suspects they must be weak if they have to hunt in a pack.[67] She kills the leader, still in human form. Then using a thrown sword, she hurls her sword skyward to kill the Winged Yoma.[68]
Anime[]
Raki accompanies Clare in the cold open of Anime Scene 2. She fights the Yoma pack amid a sandstorm. She and Raki later travel through the desert to the oasis.[69]
Egon mission[]
Clare again saves Raki from a Yoma disguised as a Claymore warrior outside Egon village, during the Egon mission.[70]
<a href="./File:Claymore_Clare's_flashback_to_childhood">  </a>
</a>
Clare's flashback to childhood
On questioning, Raki admits he was exiled from his village. Clare flashes back to her childhood, when her family was killed and a Claymore warrior saved her.
Finally, Clare lets Raki accompany her as a cook. The Organization permits this as they believe Raki's presence stabilizes Clare's mind.[71]
Shire mission[]
Later, Elena sends Clare a black card via Rubel. They rendezvous at Mount Shire, where Raki fails to stop Clare euthanizing her friend. The Shire mission ends with Clare burying her friend on the mountain.[72]
Operation Rabona[]
Clare is sent to on a covert operation to the Holy City of Rabona, on request from Father Vincent. She investigates the murders in Rabona Cathedral. She believes a Voracious Eater is responsible. But two guards interfere—Galk and Sid.[73]
Two more guards are killed in the cathedral. Clare is intercepted by Galk and Sid. During the fight another guard is killed inside the cathedral. Clare rushes inside and combats the Yoma.[74]
During the fight in the cathedral, the Yoma nearly kills Clare. Galk recovers her body.[75]
When she recovers, she examines the cathedral staff, while the Yoma, pretending to be a saint's corpse, threatens Raki downstairs.[76]
During the ensuing fight, Galk throws the goddess statue to Clare. When the Yoma tries to cut through the sculpture and Clare, a Claymore sword is reveal inside.[77]
<a href="./File:Claymore_Voracious_Eater_versus_Clare">  </a>
</a>
Clare's secret
Clare, with Galk's help, kills the Yoma.[78] When Clare awakens, Raki prevents Galk from euthanizing her and helps Clare to revert to normal.[79]
Awakened hunts[]
Toriro hunt[]
Clare disregards orders and combats Yoma alone in Toriro village. This act makes a bad initial impression on Miria when the Toriro hunt arrives.[80]
Paburo hunt[]
Clare forces the Paburo hunt to wait a week. The hunt captain, Miria, is already hostile, due to Clare's previous behavior. Helen teases Clare for bringing Raki, as well as Clare's low rank. Deneve joins the fray, untill Miria orders Helen and Deneve to put away their swords.[81]
Later in Paburo Mountains, when the hunt camps in a cave, Miria tests Clare's sword skills in the rainy night. Clare loses and faints. She lies in the rain dreaming of Teresa.[82]
The next morning, a stranger accosts them in the mountains. When Miria attacks, he turns into the Paburo awakened and wounds Deneve, Clare and Helen.[83]
Miria rescues her comrades but exhausts her Yoma energy and is caught by the awakened. Helen slips into terminal despair.[84]
But Clare returns to fight, using Preemptive Sensing to dodge the awakened's attacks. She cuts off all but one leg, but is kicked back. Then together with Miria, they finally kill the awakened.[85]
As secrets are revealed among the four warriors, Galatea is remote sensing them. Miria hints at the Organization's deepest secrets. They all agree that they have become friends, pledging to meet again.[86] They do so in the Battle of the North.
Gonahl hunt[]
Contest[]
During the Gonahl hunt, Clare meets Ophelia in the ruins of Gonahl. Ophelia discovers that Clare is half-awakened.[87] Ophelia cuts off Clare's legs, then challenges Clare to reattach her legs, before Ophelia kills Raki in sword-fight.[88]
A young girl comes on the scene, awakening into the Former Single-digit.[89]
Clare reattaches her legs and escapes with Raki, as Ophelia is preoccupied with the Single-digit.[90]
Separation[]
When Ophelia kills the Single-digit, Clare stops fleeing. She tells Raki they must separate. As Raki protests, Clare gives him a shut up kiss. She promises to find him someday.[91]
Clare lures Ophelia in a path opposite of Raki's. Clare deliberately lets her right arm be amputated by Ophelia's Rippling Sword. Clare escapes down river with her arm in her mouth, but Ophelia catches on to the trick and minces the arm and cuts off Clare remaining hand. She is about to kill Clare.[92]
But a figure from Clare's past appears, disguised in a witch cape. Clare tries to warn her away. Ophelia attacks the stranger, but an seemingly invisible force hold off the attack. Ophelia is paralyzed by thousands of cuts. The stranger reveals herself—"Quicksword" Ilena.[93]
[]
Fit for battle[]
Later, in Ilena's hidden valley, Clare convalesces in Ilena's mountain cabin. Clare's left hand is reattached, but her right arm is still missing. Ilena brings in food to help Clare recover, but Clare tries to leave. Ilena forces Clare to stay in bed.
Outside Ilena cuts down a tree. Clare comes outside and thanks her for saving her life. Ilena guesses Clare's intent to kill Priscilla. Ilena warns Clare that she is only 1/4 Yoma, not 1/2.[94]
<a href="./File:Claymore_Anime_Scene_14">  </a>
</a>
Ilena teaches Quicksword
Ilena tries teaching Clare the Quicksword. When Clare collapses, Ilena orders her to bathe and rest. After bathing in the mountain lake, Clare puts on Ilena's old shirt and leggings.
Oven a campfire, Ilena says she knows that Clare feels guilty about causing Teresa's death. But that Teresa's last days must have been happy ones. Ilena finally says, "Live, Clare! Your staying alive is the only proof that Teresa ever existed."[95]
Then next day, Ilena realizes Clare can never master the Quicksword in her one-arm condition. Ilena cuts off her own remaining arm and gives it to Clare as a "parting gift." Clare attaches it to her shoulder.[96]
Hidden Valley mission[]
After Clare leaves, Rafaela appears. Assigned to this purge mission, Rafaela tells Ilena of her impending death for desertion.
Deep in the forest, Clare feels something sudden in Ilena's arm. But an awakened Ophelia interrupts Clare's train of thought.[97]
Face-off[]
The forest combat extends to the lake. Ophelia throws Clare into the water. As they fight in the lake, Ophelia is horrified by her reflection. Here Clare utters the most famous line in the series.[98]
Ophelia plays another game. She extrudes her vital core to the tail end of the awakened body. If Clare can cut her way to the vital core, she wins. The contest ends with Clare chopping apart the entire awakened body and euthanizing Ophelia.[99]
3-month timeskip[]
Hamel[]
Clare goes AWOL for three months, as she searches for Raki. In Hamel, she dodges the Zakol hunt led by Jean. Later in the village plaza, Clare finds a statue of the twin goddesses Teresa and Clare. As she speaks to two children about Raki, a wounded warrior from Jean's hunt staggers into town. She asks Clare to save her comrades before dying.[100]
Witch's Maw[]
In the Zakol Mountains, Clare fights a Yoma pack, including two Winged Yoma.[101]
In an abandoned castle, Riful of the West supervises her consort, Dauf, in awakening Jean and Katea. Dauf senses Clare's arrival. Riful orders him to deal with Clare.[102]
Fight with Dauf[]
Round I[]
Upstairs, Clare destroys a second Yoma pack, then attacks Dauf, but gets captured.
Round II[]
Using Yoma Energy Alignment and Control, Galatea makes Dauf drop Clare into her waiting arms. Galatea tries to leave. But Dauf caves-in entrance. Despite his best efforts, all his rods miss Galatea. In the ensuing combat, she cuts off Dauf's hand.[104]
Riful suddenly appears. Riful coaches Dauf, who then defeats Galatea. Clare rescues Galatea, only to awaken. But Galatea realigns Clare back, then reveals Riful's identity as a "Creature of the Abyss."[105]
Riful explains she needs the warriors to awaken and join her army. The enemy is Isley of the North. Riful inadvertently reveals Priscilla's existence.[106] When Clare demands to know Priscilla's whereabouts, Riful promises to tell if Clare can land one sword blow on her. Riful almost tricks Clare into awakening, but Galatea realigns Clare back.[107]
Galatea orders Clare to retrieve Jean, while she holds off Dauf.[108]
Round III[]
Clare discovers Jean's awakened, butterfly-like form. Clare repeats Galatea's technique to realign Jean to normal. Jean pledges her life to Clare.[109]
Upstairs, Galatea and Clare distract Dauf, while Jean attacks his throat with Drill Sword. But this third attack ends in failure.[110]
Round IV[]
Clare and Jean make a last desperate attempt. Clare realizes her error—her Preemptive Sensing must guide her Quicksword. As Jean attacks Dauf, Clare reads Dauf's moves, her Quicksword preventing his arms from smashing Jean. Galatea stops Dauf from launching a rod from his mouth.[111]
This time Jean nearly kills Dauf, drilling through his throat, but Riful intervenes. Riful awards the warriors their freedom and reveals Isley's whereabouts.[112]
Jean persists in following Clare, much to Clare's annoyance. Despite Galatea reporting Clare and Jean dead, Rubel and Rafaela find them. Rubel tells Clare about how a group of awakened killed No. 7, Eva, and all members of the hunt she lead.
Owing to the current emergency, the Organization is willing to pardon Clare, especially after the help she gave at the Witch's Maw. Clare is to join the battle group assembling in Pieta to fight the awakened beings. Rubel adds that either Raki was abducted by slave-traders (manga), or he went north on his own volition (anime).[113]
Battle of the North[]
Member of the battle group in Pieta during the Battle of the North. Assigned to Team Flora: Lily (No. 18), Wendy (No. 30) and Carla (No. 39).[114]
Later in a cavern meeting of the original Paburo hunt, plus Jean, Miria confesses "the chances for success are zero."[115]
Engagement I[]
During the first engagement with the three scouts, Team Flora fights the Armadillo awakened. Flora, Lily, Wendy and Clare are pinned to a roof by technique resembling Yoma Energy Alignment and Control. Armadillo then remote controls Carla to execute Team Flora.[116]
Clare asks Ilena's arm for help. The arm on its own volition destroys the roof, toppling everyone to the floor below.[117]
Team Undine reinforces Team Flora. The Awakened injures several warriors with his extensible quills. He causes Undine to reach her limit, but Deneve kicks her away before she awakens. Then Deneve and Clare approach the awakened.[118] Finally, Deneve and Undine sever Armadillo's head. When the head tries to escape, Flora and Clare cut it to pieces.[119]
Later, Flora tests Clare's sword fighting abilities to see if Clare can replace Flora as team leader.[120] Anime version has Jean preventing fight.[121]
Engagement II[]
Manga and anime diverge here.
Manga[]
Clare appears in Yuma's flashback. In the banquet hall of the Eastern Inn, Miria holds a meeting with the battle group. She tells everyone to take a half dose of suppressant. If rendered unconscious during combat, a warrior will radiate no aura, making her appear dead to both the Northern Army and Organization.[122]
Meanwhile, Raki has escaped a slave prison and "saves" Priscilla from falling debris. Here he is introduced and stays with Isley, who befriends Raki. Later Isley orders Rigaldo to lead the Northern Army into Pieta.[123]
During the initial fighting, Flora and Clare ambush the Stegosaur awakened.[124]
After losing three awakened, Rigaldo decides to decapitate the battle group leadership. As the Silver Lion, he kills Veronica and Undine, then wounds Jean. Clare partially awakens and attacks. But Rigaldo repels Clare and kills Flora.[125]
He wounds Deneve. Clare further awakens. Rigaldo finally captures Miria, but Clare cuts off his arm.[126] As Clare and Rigaldo fight, Helen rescues Miria and destroys Rigaldo's arm. Clare gains control of her speed by awakening her left arm into a giant claw, which she uses as a brake. She eventually kills Rigaldo.[127]
Clare's awakening out of control, she asks that Helen kill her, but Jean intervenes and dies realigning Clare to normal.[128]
When Clare weeps over Jean's body, Deneve kicks Clare away. As the Northern Army surrounds the last six warriors standing, Deneve tells Clare the time for grieving is over.[129]
After the end of the second engagement, seven Claymores survive—Miria, Cynthia, Deneve, Helen, Tabitha, Yuma and Clare.[130]
Anime[]
The Northern Army invades Pieta, but retreats. The Rigaldo sequence is similar to the manga.[131]
Raki gallops to Pieta, followed by Priscilla. She awakens and Clare gives chase. Galatea directs Miria, Deneve and Helen to volcano, where Clare and Priscilla fight[132]
<a href="./File:Claymore_Volcano">  </a>
</a>
Priscilla and Clare fight in volcano
After Clare's defeat, Priscilla engages and defeats Miria, Deneve and Helen.[133] Jean and Raki arrive. Clare returns to fight and overwhelms Priscilla, who reverts to her human form. But Raki stops Clare from executing Priscilla. Jean dies returning Clare to normal. Isley takes away Priscilla.
Next day, Miria, Deneve, Helen and Clare desert the Organization. Clare descends the volcano with Raki. The ghost of Teresa bids farewell. The anime series ends here.[134]
7-year timeskip[]
Alfons[]
Clare is one of seven Ghosts who desert the Organization. Hiding in mountains, they train with Yoma power-less techniques. Miria serves as captain.
In a deserted village, Clare discovers a slave prison, which bears evidence that Raki escaped. Back at the cavern hideout, Clare announces her intent to go south. Miria tests Clare's fighting ability. Satisfied, Miria says she will accompany Clare. But everyone decides to go en masse.[135]
Toulouse[]
Audrey's hunt[]
The Ghosts encounter Riful's aura. Clare, Miria, Deneve and Helen rescue Audrey's hunt from Riful.[136]
The Ghosts rescue the warriors, but Clare stays behind.[137] Riful tells Clare what happened during the 7-year timeskip.[138] Later the hunt captain, Audrey, hints that Galatea may still be alive.[139]
Agatha[]
In Rabona, the Ghosts engage the awakened Agatha.[140] The Ghosts force out Agatha's vital core, who takes Galatea hostage. But in the end Clare rescues her.[141]
Afterward, Miria reveals her theory that awakened beings are created by the Organization to be used in an overseas war. The warriors are left horrified and confused.[142]
During a tavern party, Sid tells Clare that Raki was in town looking for her. Galk reassures Clare that she and Raki must meet again.[143]
Left behind[]
Miria tells everyone to take care of personal business before the last battle with the Organization. Clare travels west to Lautrec—with Cynthia and Yuma—to find Raki. Helen goes south to her hometown in Mucha, accompanied by Deneve.
Miria will wait in Rabona for everyone's return, but she adds one caveat: "When the time comes, I'll go forward alone if I must."[144] foreshadowing the events of Scene 106.
Lautrec[]
Lacroix[]
Near the Toulouse border, Clare and Cynthia sense an awakened in the village of Lacroix. In the village itself they find a search and rescue team looking for Renée. When a woman spectator awakens, Clare and Cynthia combat the awakened, while Yuma knocks unconscious the Organization team—three Claymore warriors and two Men in Black. The awakened tries to escape as a flying Yoma but is killed.[145]
But Rubel witnesses everything. Later in a private meeting under a gateway arch, Cynthia realizes that Rubel is a mole for the Dragons' allies.[146]
Rubel plays on their sympathies by claiming that Rafaela and Renée are being held captive by Riful. Clare suspects that Rubel is only trying to get them killed.[147] Despite this, Clare decides to continue travelling west.[148]
Witch's Maw II[]
Baited by Rubel, the warriors continue their search for Renée and Rafaela. In a forest, they encounter Dauf, who grabs Yuma's leg—Clare cuts it off. While Cynthia regenerates Yuma's leg, Clare follows Dauf into an abandoned castle, the Witch's Maw II. A combat ensues inside, but Clare escapes.[149]
While Riful checks on Dauf, Renée takes suppressants and flees. Dauf tries to pursue her, but she loses him. Riful takes revenge and destroys the forest, killing Renée. While Riful and Dauf are distracted, Clare reenters the castle.[150]
Dream within a dream[]
In the replay of Scene 50 and Anime Scene 18, Clare leads Jean through the forest. Clare stops, sensing a powerful Yoma aura—Rafaela's.[151]
When Clare reaches out to touch Jean, no one is there. Rafaela attacks. Clare uses Windcutter, but despite Rafaela's lack of peripheral vision and depth perception, Clare mysteriously cannot keep up—she is beheaded.[152]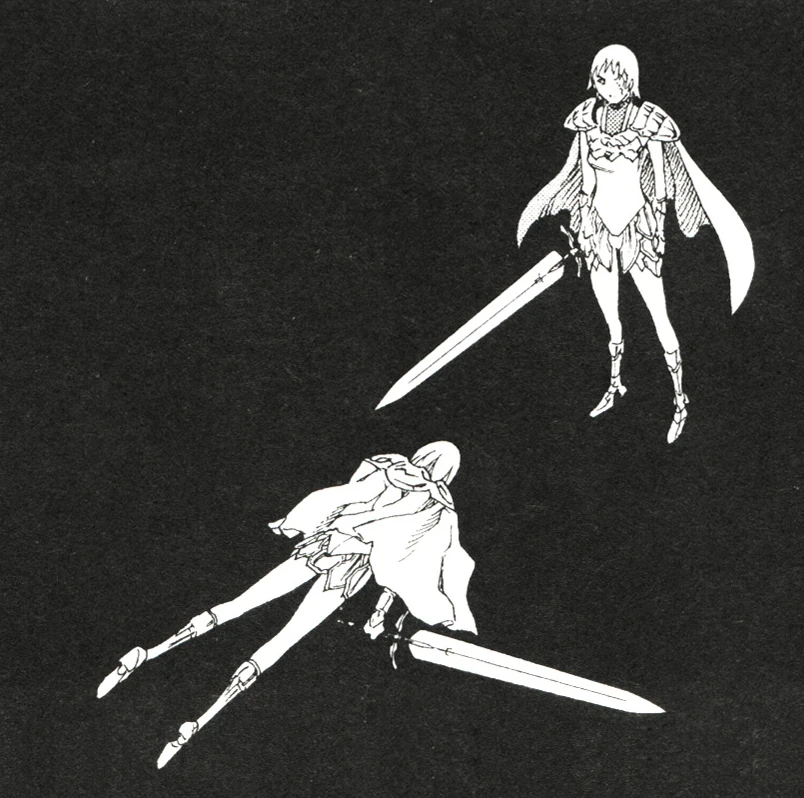
Nightmare within a nightmare
But Clare wakes from a dream within a dream. Switching from Windcutter to Quicksword, Clare kills Rafaela with Ilena's arm. Rafaela gives Clare all her memories, among which is "something you must know."[153]
Destroyer[]
When the Destroyer awakens, the castle bursts apart.[154]
Clare's naked body emerges from sea of Yoma tissue. She gazes upon a sky-high entity—the Destroyer—a demonic parody of twin goddesses of love, Teresa and Clare.[155]
Destroyer forms a crown of rods, resembling the radiant halo of Apollo.[156] A 180 degree barrage of rods begins as Deneve and Helen reach Clare.[157]
Hellcats[]
The mewing rods morph into demonic cat-like bipeds, which attack Clare, Deneve and Helen.[158]
Deneve, Helen and Clare counterattack. One Hellcat shoots rods into Deneve's arm. The rods prove parasitic—they absorb the life of any living thing they touch.[159]
When a Hellcat fires a barrage of rods, Clare ricochets them back to the source.[160]
Eventually, the Hellcats surround the warriors, bringing back memories of Pieta.[161]
Priscilla[]
Between rod volleys, Priscilla finds the source of Teresa's scent. Clare confronts Priscilla for first time since Clare's childhood.[162] Clare is ready to abandon friends and her humanity to avenge Teresa's death.[163]
But Jean's mental "block" prevents Clare from awakening, causing her attacks to fail. Deneve and Helen grab Clare and flee from Priscilla.[164]
Deneve decides to seek refuge with the Destroyer. Destroyer swallows Clare's legless torso before Priscilla's arrival.[165] Deneve and Helen fight Priscilla, but Clare takes control of the Destroyer and swallows Priscilla in a Yoma energy mass.[166]
The mass later contracts into a winged cocoon.
Return to Rabona[]
Ghosts bring the cocoon back to the Holy City. On examination, Galatea realizes that releasing Clare means releasing Priscilla.[167]
Sutafu[]
During the battle at Organization Headquarters, Deneve reassures Miria that Clare is "resting" in Rabona.[168]
Later, after attacking a Yoma energy apparition of Priscilla, Deneve admits that Clare is trapped with Priscilla.[169]
Raki and the trainees approach the warriors. He tells the warriors that he was the boy who accompanied Clare seven years ago.[170]
Return of Clare[]
The Ghosts use Raki's plan on sailing back to Rabona.
Cocoon[]
The Ghosts and Raki visit the Yoma cocoon the next morning after arriving at the Holy City.[171]
Galatea cannot detect Clare's aura and sees little hope of pulling out Clare. But Raki dares to approach the cocoon, despite Galatea's warning. Deneve defends Raki's decision.
When Raki lays his hands on and speaks to the cocoon, tentacles pierce his body. Galatea calls for help, but Raki says the cocoon is only probing his body. The tentacles soon withdraw.[172]
Clare exits[]
Confession[]
Tearfully, Raki confesses that despite his great size and strength, Clare is still the stronger one, and that he only wishes to be at Clare's side forever.[173]
A section of the cocoon crumbles and out comes Clare.[174]
Danger[]
But Clare's internal organs are spilling out from the vertical incision running down the length of her torso. While Raki and Yuma keep Clare's organs from coming out, Deneve quickly sews up Clare with crude stitching. She explains that the Organization never solved the problem of healing the Yoma implant incision. Sutures were used to keep the warriors whole.[175]
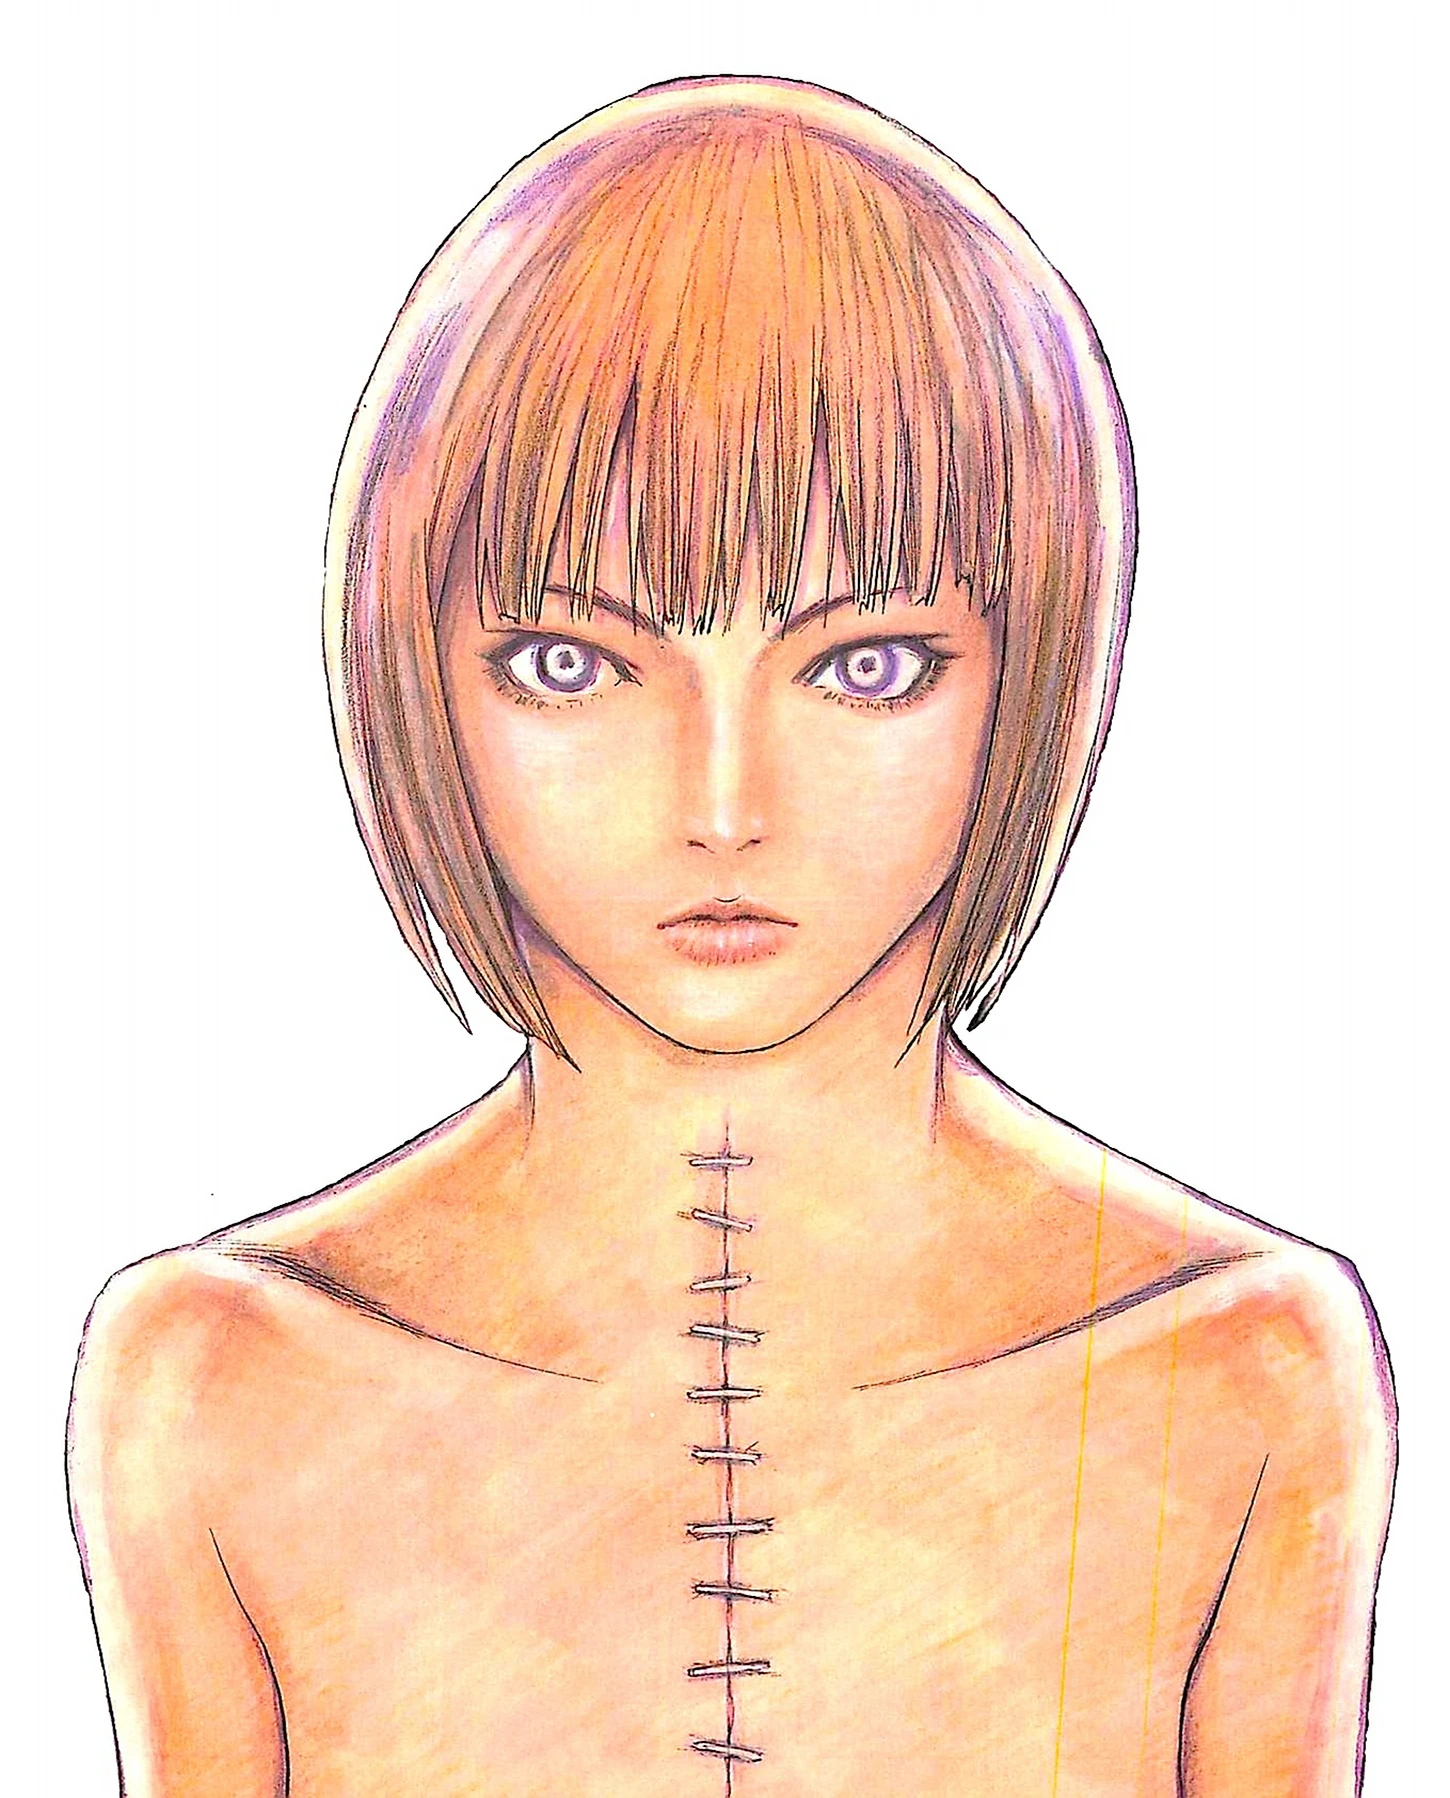
Clare with sewn stigma
Friends rejoined[]
The Ghosts look on as Raki hugs a tearful Clare with all his might.[176]
Two combats[]
In flashback, after Clare emerges from the cocoon, Miria fails to kill Priscilla. Instead, a combat between the Destroyer and Priscilla engulfs the awakened audience.
Two female awakened are hurled into the city. They awakened into huge tapeworm- and origami-like forms.[177] The Ghosts and Rabona guards combat the two awakeneds.
Miria and Clare dodge Tapeworm awakened's attack. Tapeworm bristles with dozens of armless torsos, each identical—only one contains the vital organs, according to Tabitha. But the situation is complicated by the awakened's Yoma aura spread evenly among the torsos.[178]
Miria and Clare race to find the vital core. Clare realizes her movements are those of Rafaela, who used a Yoma energy membrane technique, allowing Clare to sense movement beyond her peripheral vision. Miria and Clare reach the last torso and together they make the final strike.[179]
Cassandra[]
Round I[]
Later, outside Rabona, Clare and the Ghosts confront the awakened Cassandra, who launches her tentacled heads. While Clare's comrades take evasion action, Clare stays her ground and confronts Cassandra alone. Immediately Clare is surrounded by four tentacled heads.[180]
Clare fully awakens Ilena's arm and counterattacks with Quicksword. Clare first minces one head, then two, then the fourth. Cassandra attacks with her locomotive tentacles, but Clare minces these too.[181]
In a final lunge, Clare tries to destroy Cassandra's vital core, but only damages the awakened body's left breast and Cassandra's real left arm.[182]
Clare lands nearby as Cassandra regenerates. Clare estimates that after the 7-year timeskip, her Quicksword technique may equal Ilena's.[183]
Round II[]
Octavia's party join the fray. Despite their attacks, Cassandra holds her own.
The fight with Cassandra suddenly stops. Octavia's Party and the Ghosts watch surprised as Cassandra stands upright. The “pilot” torso on the awakened form begins to sprouts wings.[184]
Cassandra's tentacles spin like a string trimmer as they mow down the surrounding forest and members of Octavia's Party. Miria orders a retreat. Clare jumps above the tentacles of Cassandra, whose pilot torso is plainly Priscilla's.[185]
Round III[]
Octavia and her remaining comrade are dismayed at the failure of their attack. Helen thinks only two members of Octavia's Party have survived. But Chronos corrects Helen and throws Europa's still-living head near the Ghosts.[186]
Chronos concedes that he and Lars must join the fight. Lars identifies Europa and describes her special technique—feigning death. As Europa fully awakens, Chronos reveals her moniker, “Europa the Sloth.” He points out that Europa is the only one present that is close in power to an Abyssal.[187]
Both Chronos and Lars awaken, revealing similar biped forms. They join the assault on Priscilla–Cassandra, as do Miria and Clare. Octavia immobilizes Priscilla–Cassandra, preventing her from using the Dusteater. This allows Europa to use her version of the "Trimmer" technique.
The three female and two male awakeneds weaken Priscilla–Cassandra enough for Clare to attack. She eviscerates the thorax of Cassandra's body, destroying the pilot torso of Priscilla.[188]
The old Cassandra pilot torso returns, as does Cassandra's sense of self. Helen notices that Cassandra is not moving as slowly as before. Miria suspects that under Priscilla's spell, Cassandra's movements were restrained—Cassandra took far more injuries here than when fighting Roxanne in Sutfafu. But by destroying the Priscilla pilot torso, Clare inadvertently unleashed Cassandra's true power.[189]
Additional details[]
Audio[]
- From Claymore Intimate Persona, 記憶 Kioku (Remembrance): Clare—Houko Kuwashima 4:50
Figure[]
- Clare model as Claymore warrior No. 47, 1/8 scale, available from MegaHouse.
References[]
Tankōbon Claymore volumes cited are VIZ Media (en-us) editions, unless otherwise noted. Manga scenes (chapters) not yet translated cite Shueisha tankōbon (ja) editions. Manga scenes not yet published in tankōbon form cite Jump SQ (ja) editions. Fragments of Silver Omnibus (総集編 銀の断章 Gin no Danshou) 1–3, Shueisha, are only available in Japanese. Anime scenes (episodes) cited are FUNimation (en-us) editions, unless otherwise noted.
- ↑ Claymore, Scene 1, p. 67
- ↑ Claymore 1, Tokyopop, Scene 1, p. 67
- ↑ Claymore 1, Ediciones Glénat España, Scene 1, p. 67
- ↑ Shonen Jump, March 2006, VIZ Media, Claymore, Scene 1, p. 79
- ↑ Claymore 1, Glénat Édition Française, Scene 1, p. 67
- ↑ Claymore 1, Star Comics, Scene 1, p. 65
- ↑ Claymore, Yamato Video, Anime Scene 2
- ↑ Claymore, Daewon CI Scene 1, p. 67
- ↑ Claymore 1, Comix-ART, Scene 1, p. 67
- ↑ Claymore 1, Culturecom, Scene 1, p. 67
- ↑ Claymore 1, Ever Glory, Scene 1, p. 67
- ↑ Claymore 1, Shueisha, Scene 1, p. 67
- ↑ Fragments of Silver Omnibus 3, "Yoma War Record III," p. 730
- ↑ Fragments of Silver Omnibus 1, "Yoma War Record I," p. 506
- ↑ Fragments of Silver Omnibus 1, "Yoma War Record I," p. 506
- ↑ Fragments of Silver Omnibus 1, "Yoma War Record I," p. 506
- ↑ Claymore 12, Scene 67, p. 119
- ↑ Claymore 3, Scene 15, pp. 186–187
- ↑ Claymore, Elex Media Komputindo, Scene 1, p. 67
- ↑ Claymore, Scene 1, Grupo Editorial VID, p. 67
- ↑ Shonen Jump, March 2006, VIZ Media, Claymore, Scene 1, p. 79
- ↑ Claymore, Scene 1, p. 67
- ↑ Fragments of Silver 2 Omnibus, poster insert
- ↑ Claymore 7, Scene 39, p. 183
- ↑ Angel Densetsu 10, Act 28, p.41
- ↑ Berserk 1, Jets Comics, Chapter 2, p. 106–158
- ↑ Claymore, Anime Scene 5
- ↑ Claymore 3, Scene 14, p. 141; Claymore, Claymore, Anime Scene 5
- ↑ Claymore 1, Scene 4, p. 161
- ↑ Jump SQ, September 2012, Claymore, Scene 129, pp. 651–655
- ↑ Jump SQ, October 2012, Claymore, Scene 130, p. 424
- ↑ Claymore, Anime Scene 1
- ↑ Claymore 11, Scene 59, pp. 66–67; Claymore, Anime Scene 23
- ↑ Claymore 3, Scene 13, p. 105
- ↑ Claymore 3, Scene 13, p. 104
- ↑ Jump SQ, June 2013, Claymore, Scene 138, p. 669
- ↑ Jump SQ, June 2013, Claymore, Scene 138, p. 670
- ↑ Fragments of Silver Omnibus 1, "Yoma War Record I," p. 506
- ↑ Fragments of Silver Omnibus 1, "Yoma War Record I," p. 506
- ↑ Fragments of Silver Omnibus 1, "Yoma War Record I," p. 506
- ↑ Fragments of Silver Omnibus 1, "Yoma War Record I," p. 506
- ↑ Claymore 3, Scene 3, pp. 144–145; Claymore, Anime Scene 1
- ↑ Claymore 3, Scene 12, pp. 124–125; Claymore, Anime Scene 4
- ↑ Claymore 3, Scene 14, pp. 156–159; Claymore, Anime Scene 5
- ↑ Claymore 3, Scene 15, p. 186–191; Claymore, Anime Scene 5
- ↑ Claymore 4, Scene 16–Scene 17, pp. 36–51
- ↑ Claymore 4, Scene 17–Scene 18, pp. 69–89; Claymore, Anime Scene 6
- ↑ Claymore 4, Scene 19, p. 118; Claymore, Anime Scene 7
- ↑ Claymore 4, Scene 20, pp. 135–137; Claymore, Anime Scene 8
- ↑ Claymore 4, Scene 20–Scene 21, pp. 141–189; Claymore, Anime Scene 8
- ↑ Claymore 5, Scene 22, pp. 9–35; Claymore, Anime Scene 8
- ↑ Claymore 5, Scene 23, pp. 39–65; Claymore, Anime Scene 8
- ↑ Claymore 5, Scene 24, p. 71; Claymore, Anime Scene 8
- ↑ Claymore 5, Scene 24, pp. 82–87; Claymore, Anime Scene 8
- ↑ Claymore 5, Scene 24, p. 99; Claymore, Anime Scene 9
- ↑ Claymore 5, Scene 24, p. 98; Claymore, Anime Scene 9
- ↑ Claymore 16, Scene 84, p. 33
- ↑ Claymore 1, Scene 4, p. 173; Claymore, Anime Scene 2
- ↑ Claymore 14, Extra Scene 4, pp. 162–165
- ↑ Claymore 14, Extra Scene 4, pp. 186–187
- ↑ Claymore 1, Scene 1, pp. 54–55; Claymore, Anime Scene 1
- ↑ Claymore, Anime Scene 1
- ↑ Claymore 1, Scene 3, pp. 110–111
- ↑ Claymore 1, Scene 2, pp. 76–77
- ↑ Claymore 1, Scene 2, pp. 83–84
- ↑ Claymore 1, Scene 2, pp. 82–86
- ↑ Claymore 1, Scene 2, p. 87–95
- ↑ Claymore 1, Scene 2, pp. 95–104
- ↑ Claymore, Anime Scene 2
- ↑ Claymore 1, Scene 3, pp. 125–133
- ↑ Fragments of Silver Omnibus 1, "Yoma War Record I," p. 507
- ↑ Claymore 1, Scene 4, pp. 180–181; Claymore, Anime Scene 2
- ↑ Claymore 2, Scene 5, p. 38; Claymore, Anime Scene 3
- ↑ Claymore 2, Scene 6, pp. 47–85; Claymore, Anime Scene 3
- ↑ Claymore 2, Scene 7, p. 98; Claymore, Anime Scene 3
- ↑ Claymore 2, Scene 7–Scene 8, pp. 119–153; Claymore, Anime Scene 3
- ↑ Claymore 3, Scene 9, pp. 155–185; Claymore, Anime Scene 4
- ↑ Claymore 3, Scene 10–Scene 11, pp. 24–41; Claymore, Anime Scene 4
- ↑ Claymore 3, Scene 11, pp. 43–58; Claymore, Anime Scene 4
- ↑ Claymore 5, Scene 25, pp. 106–110; Claymore, Anime Scene 9
- ↑ Claymore 5, Scene 25, pp. 123–125; Claymore, Anime Scene 9
- ↑ Claymore 5, Scene 26, pp. 144–156; Claymore, Anime Scene 9
- ↑ Claymore 5, Scene 26–Scene 27, pp. 159–195; Claymore, Anime Scene 9–Anime Scene 10
- ↑ Claymore 6, Scene 28, pp. 11–31; Claymore, Anime Scene 10
- ↑ Claymore 6, Scene 29, pp. 60–61; Claymore, Anime Scene 10
- ↑ Claymore 6, Scene 30–Scene 31, pp. 71–114; Claymore, Anime Scene 11
- ↑ Claymore 6, Scene 31, pp. 126–127; Claymore, Anime Scene 12
- ↑ Claymore 6, Scene 32, pp. 141–143; Claymore, Anime Scene 12
- ↑ Claymore 6, Scene 32, p. 157; Claymore, Anime Scene 12
- ↑ Claymore 6, Scene 33, pp. 163–185; Claymore, Anime Scene 12
- ↑ Claymore 7, Scene 34, pp. 22–30; Claymore, Anime Scene 12
- ↑ Claymore 7, Scene 35, pp. 35–65; Claymore, Anime Scene 12
- ↑ Claymore 7, Scene 36, pp. 86–87; Claymore, Anime Scene 13
- ↑ Claymore 7, Scene 37, p. 106
- ↑ Claymore 7, Scene 38, pp. 123–135
- ↑ Claymore 7, Scene 38, pp. 136–147; Claymore, Anime Scene 14
- ↑ Claymore 7, Scene 38, p. 153; Claymore, Anime Scene 14
- ↑ Claymore 7, Scene Scene 39, pp. 160–185; Claymore, Anime Scene 14
- ↑ Claymore 8, Scene 40, pp. 20–37; Claymore, Anime Scene 14
- ↑ Claymore 8, Scene 41, pp. 61–66; Claymore, Anime Scene 15
- ↑ Claymore 8, Scene 42, pp. 71–79; Claymore, Anime Scene 16
- ↑ Claymore 8, Scene 42, p. 100; Claymore, Anime Scene 16
- ↑ Claymore 8, Scene 43, p. 132; Claymore, Anime Scene 16
- ↑ Claymore 8, Scene 44, pp. 137–156; Claymore, Anime Scene 16
- ↑ Claymore 8, Scene 44–Scene 45, pp. 157–183; Claymore, Anime Scene 16
- ↑ Claymore 8, Scene Scene 45, pp. 184–189; Claymore, Anime Scene 16
- ↑ Claymore 8, Scene 46, pp. 7–19; Claymore, Anime Scene 16
- ↑ Claymore 9, Scene 46, pp. 20–26; Claymore, Anime Scene 16
- ↑ Claymore 9, Scene 46–Scene 47, pp. 44–44; Claymore, Anime Scene 17
- ↑ Claymore 9, Scene 47, pp. 51–63; Claymore, Anime Scene 17
- ↑ Claymore 9, Scene 47–Scene 48, pp. 66–92; Claymore, Anime Scene 17
- ↑ Claymore 9, Scene 49, pp. 110–113; Claymore, Anime Scene 17
- ↑ Claymore 9, Scene 50, p. 140–146; Claymore, Anime Scene 18
- ↑ Claymore 9, Scene 51, p. 173; Claymore, Anime Scene 18
- ↑ Claymore 9, Scene 51, p. 184
- ↑ Claymore 10, Scene 52, p. 29; Claymore, Anime Scene 18
- ↑ Claymore 10, Scene 52, p. 31
- ↑ Claymore 10, Scene 53, pp. 37–69; Claymore, Anime Scene 18–Anime Scene 19
- ↑ Claymore 10, Scene 54, pp. 80–81; Claymore, Anime Scene 19
- ↑ Claymore 10, Scene 55, p. 108
- ↑ Claymore, Anime Scene 20
- ↑ Claymore 12, Scene 66, pp. 83–87
- ↑ Claymore 10, Scene 55–Scene 56, pp. 123–153; Claymore, Anime Scene 20
- ↑ Claymore 10, Scene 57, pp. 164–167
- ↑ Claymore 10, Scene 57, p. 168–184
- ↑ Claymore 11, Scene 58, pp. 34–35
- ↑ Claymore 11, Scene 59, pp. 68–69
- ↑ Claymore 11, Scene 60, pp. 78–87
- ↑ Claymore 11, Scene 61, pp. 95–101
- ↑ Claymore 12, Scene 66, pp. 93–94
- ↑ Claymore, Anime Scene 23
- ↑ Claymore, Anime Scene 24
- ↑ Claymore, Anime Scene 25
- ↑ Claymore, Anime Scene 26
- ↑ Claymore 12, Scene 67, p. 132–133
- ↑ Claymore 12, Scene 68–Scene 69, pp. 153–183
- ↑ Claymore 13, Scene 70, p. 26–37
- ↑ Claymore 13, Scene 71, p. 47–57
- ↑ Claymore 13, Scene 72, pp. 80–83
- ↑ Claymore 13, Scene 77, pp. 124–127
- ↑ Claymore 15, Scene 78, pp. 7–37
- ↑ Claymore 15, Scene 79–Scene 80, pp. 52–77
- ↑ Claymore 15, Scene 80, p. 86
- ↑ Claymore 15, Scene 82, p. 154
- ↑ Claymore 15, Scene 83, pp. 1—81–193
- ↑ Claymore 16, Scene 84, p. 32
- ↑ Claymore 16, Scene 84, p. 37
- ↑ Claymore 16, Scene 85, p. 42
- ↑ Claymore 17, Scene 90–Scene 91, pp. 20–50
- ↑ Claymore 17, Scene 91, p. 61
- ↑ Claymore 17, Scene 92, pp. 65–66
- ↑ Claymore 17, Scene 92, pp. 68–74
- ↑ Claymore 17, Scene 92, p. 89
- ↑ Claymore 17, Scene 93, pp. 98–99
- ↑ Claymore 17, Scene 93, p. 108
- ↑ Claymore 17, Scene 94, p. 148
- ↑ Claymore 17, Scene 94, pp. 150–151
- ↑ Claymore 17, Scene 95, pp. 161–163
- ↑ Claymore 17, Scene 95, pp. 168–170
- ↑ Claymore 17, Scene 95, p. 173
- ↑ Claymore 17, Scene 95, p. 178
- ↑ Claymore 18, Scene 99, pp. 124–125
- ↑ Claymore 18, Scene 100, pp. 150–151
- ↑ Claymore 18, Scene 101, p. 177
- ↑ Claymore 19, Scene 104, p. 93
- ↑ Claymore 19, Scene 105, p. 125
- ↑ Claymore 20, Scene 109, p. 50
- ↑ Claymore 22, Shueisha, Scene 123, p. 107
- ↑ Jump SQ, May 2012, Claymore, Scene 125, p. 701
- ↑ Jump SQ, May 2012, Claymore, Scene 125, pp. 704–705
- ↑ Jump SQ, September 2012, Claymore, Scene 129, pp. 634–637
- ↑ Jump SQ, September 2012, Claymore, Scene 129, pp. 640–644
- ↑ Jump SQ, September 2012, Claymore, Scene 129, pp. 645–646
- ↑ Jump SQ, September 2012, Claymore, Scene 129, pp. 647–650
- ↑ Jump SQ, September 2012, Claymore, Scene 129, pp. 651–655
- ↑ Jump SQ, September 2012, Claymore, Scene 129, pp. 658–659
- ↑ Jump SQ, November 2012, Claymore, Scene 131, pp. 367–369
- ↑ Jump SQ, November 2012, Claymore, Scene 131, pp. 378–380
- ↑ Jump SQ, November 2012, Claymore, Scene 131, pp. 382–389
- ↑ Jump SQ, January 2013, Claymore, Scene 133, pp. 760–764
- ↑ Jump SQ, January 2013, Claymore, Scene 133, pp. 765–767
- ↑ Jump SQ, January 2013, Claymore, Scene 133, pp. 767–768
- ↑ Jump SQ, January 2013, Claymore, Scene 133, pp. 769–771
- ↑ Jump SQ, April 2013, Claymore, Scene 136, pp. 397–402
- ↑ Jump SQ, April 2013, Claymore, Scene 136, pp. 403–410
- ↑ Jump SQ, May 2013, Claymore, Scene 137, pp. 210–211
- ↑ Jump SQ, May 2013, Claymore, Scene 137, pp. 212–213
- ↑ Jump SQ, May 2013, Claymore, Scene 137, pp. 218–234
- ↑ Jump SQ, June 2013, Claymore, Scene 138, pp. 679–680