| Rebellion | |
|---|---|
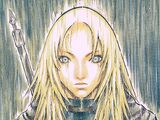
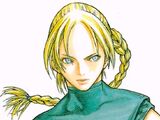
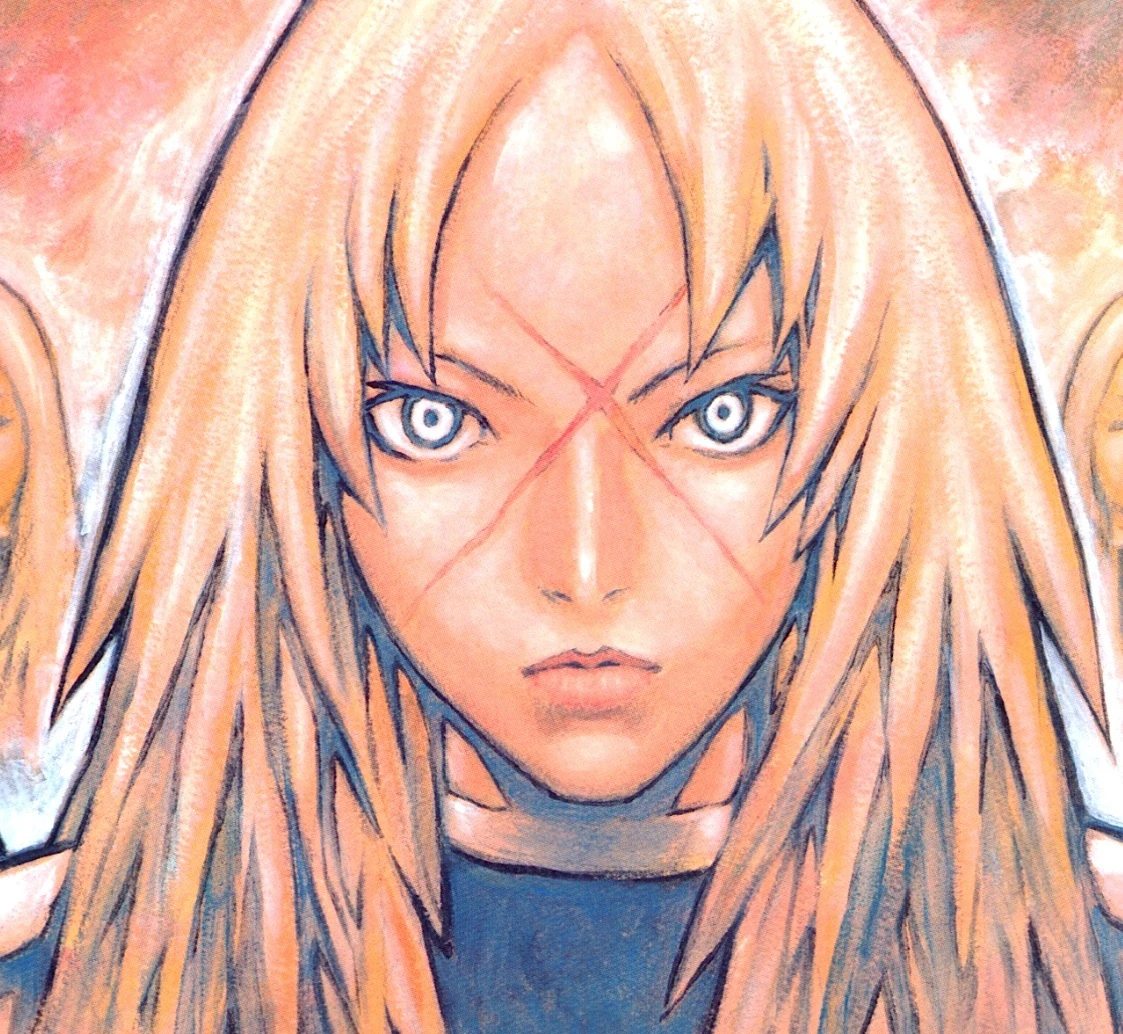 Miria | |
|
VIZ Media name |
Rebellion[1] |
|
Variant |
|
|
Original name |
反逆[4] Hangyaku |
|
Region |
Sutafu [5] |
|
Locale |
Organization Headquarters [6] |
|
Description |
Claymore warrior rebellion |
|
Current status |
Organization defeated |
|
Leader |
Miria |
|
Quote |
I declare rebellion.[7] |
|
First mention |
Scene 113 |
|
First appearance |
|
- Rebellion ↓
 No. 6—Miria
 No. 3—Audrey
 No. 5—Rachel
- No. 7—Anastasia
- No. 9—Nina
- No. 10—Rafutera
- No. 11—Violet
- No. 12—Leticia
- No. 13—Abigail
- No. 14—Cynthia
- No. 14—Lena
- No. 15—Deneve
- No. 15—Nike
- No. 16—Tesla
- No. 19—Dominique
- No. 22—Helen
- No. 22—Norma
- No. 24—Minerva
- No. 31—Tabitha
- No. 40—Yuma
- Twin Trainees
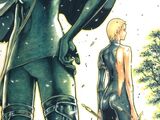
- Raki


Etymology[]
First described by Miria.[8] Also described as 反乱 hanran (mutiny).[9]
History[]
Reappearance[]
Later, as rebellion begins, Miria reappears to lead the rebels.[10]
Rafutera[]
Inquiry[]
Rafutera reports to Limt. He asks why she did not sense Miria's presence. She says since she was not asked about Miria's Yoma aura, she did think it necessary to answer. Limt now realizes that Rafutera has betrayed the Organization. He asks her why.[11]
Rafutera say during the final attack on Miria, the warriors felt confusion, fear, anger and sorrow as well as love and respect. Still half-human, the warriors hesitated at killing a sister warrior.[12]
Judgment[]
Limt's inquiry is actually Rafutera's court-martial. Rafutera is impaled by spears as punishment (and taken prisoner).[13]
Dae still needs several hours to deploy the resurrected No. 1s. To buy time, Limt orders all "things" (Abyss Feeders) released outside, despite their indiscriminate attacks. Loyal personnel must stay indoors.[14]
Resurrected[]
Dae releases the the three resurrected No. 1s. Despite panicky subordinates, Limt is unconcerned as the three former No. 1s, Hysteria, Roxanne and Cassandra, proceed on their mission of annihilation.[15]
Massacre[]
Reanimated warriors instantly cut down rebels en masse.
Counterattack[]
The four strongest rebel warriors—Miria, Audrey, Rachel and Nina—plus Twin Trainees, recover. Audrey, Rachel and Nina fight Cassandra. And the Twins fight Roxanne.[16]
Hysteria[]
Miria ends up fighting Hysteria. Miria discovers that Hysteria uses a technique similar to Phantom. But where Miria gains distance from attacks, leaving behind afterimages, Hysteria makes passing attacks, her afterimage flowing through target.[17]
"Old" Phantom[]
Miria reverts back to old Phantom, plus partial awakening.[18]
Miria uses the original Phantom, barely surviving each strike from Hysteria. Finally, Miria increases her baseline Yoma power to the Phantom's burst level, then jumps it from there.[19]
"Unflowing" Hysteria[]
Miria can now strike Hysteria, even though she also sustains wounds. Hysteria is appalled at this crude technique.[20]
Miria's trap I[]
Despite Cassandra's awakening, Hysteria continues the fight with Miria—she cuts of Miria's arm. Miria succeeds in impaling Hysteria, at the cost of losing her other arm.[21]
Unknown to Hysteria, Miria spots a lost sword on the battlefield. Miria throws her body over it—hiding it—then waits for Hysteria.
When Hysteria comes to deliver the coup de grace, Miria clutches the sword hilt in her teeth and runs Hysteria through the neck. Hysteria collapses.[22]
Chaos[]
With all three resurrected warriors awakened, the situation turns chaotic for all parties concerned.
As Miria evacuates another wounded warrior, she flees then confronts an awakened Hysteria, a Dada-like juxtaposition of harpy ship's figurehead, bristling with Cubist sabres and spider legs.[23] Hysteria cannot swallow, due to the sword in her throat.[24]
Miria rejects Hysteria's offer to let Miria go free if Miria removes the sword. Hysteria dodges Miria's attack. Mira further awakens, but is pulled down to earth by Anastasia's hair. The Ghosts, Anastasia's hunt and Dietrich have arrived.[25]
Comrades[]
Cynthia calms Miria's runaway Yoma power, while Yuma regenerate Miria's injuries.[26] Meantime, Deneve and the Ghosts rescue the two warriors impaled on Hysteria's limbs.[27]
Rescue[]
Six warriors attack—Deneve, Anastasia, Dietrich, Nike, Helen and Tabitha. They use Anastasia's Winged Technique to stay aloft, highwire style.[28]
Hysteria evades Helen's Flexible Limb Stretching-Drill Sword attack, but fails to spot Dietrich and Nike, who cut free the captives. Anastasia and Helen catch the plunging warriors.[29]
Yoma power hidden, Tabitha succeeds in approaching Hysteria, then clipping her wings. But when the others close in, Hysteria instantly retreats to earth. The warriors are left crossing each other's swords.[30]
Counterattack[]
Suddenly, Hysteria flies skyward, destroying Deneve's left arm, then Nike's right.[31] High above the suspended warriors, Hysteria fires something—it carves out the side of Dietrich's abdomen. Only Anastasia, Helen and Tabitha remain uninjured.[32]
Hysteria's secret[]
As Hysteria fires her tethered blades, Miria analyzes the situation.
On the ground, Hysteria's sudden turns and stops are due to leg traction, similar to the great claw Clare used to control her speed in Pieta.[33] When aloft, Hysteria's blades, once anchored, allow her to suddenly change direction, horizontally or down.[34]
Miria begins to awaken, hoping that she only fights Hysteria and not turn on the warriors. But Deneve persuades Miria to fight and die as a human.[35]
Deneve shows Miria how to use Anastasia's hair by injecting one's Yoma Energy to adjust the strength. Midair, Miria devise a plan.[36] She has Anastasia weave together several hair strands, in which all eight warriors begin to inject Yoma power.[37]
Deneve and the Ghosts watch as Miria draws Hysteria into the maelstrom between Cassandra and Roxanne.[38]
Molting[]
Cassandra continues eating as she battles Roxanne.[39] Using Flexible Limb Stretching, Helen again loosens the anchoring blades, unbalancing Hysteria's movement.[40] Suddenly, Hysteria sheds her pupal shell, molting into a mosquito-like form.[41]
Barrage[]
Despite the proximity of the Hysteria-Miria dual, Cassandra and Roxanne fight on, oblivious to the other battle. Roxanne launches her faulds-like blades at Cassandra.[42]
Miria's trap II[]
No longer needing her blades to control her direction, Hysteria becomes even faster than before.[43]
Ground zero[]
Miria is losing the fight, being wounded repeatedly by Hysteria. But Miria doggedly lures Hysteria into position. Nearby, Cassandra dares Roxanne to use up her blades. Just before Roxanne launches her final volley to finish off Cassandra, Miria touches on Anastasia's cord of hair,[44] then launches herself at hyper-speed past Hysteria, fleeing ground zero.[45]
Target[]
Hysteria, distracted in her pursuit of Miria, is hit by a blade midair, then bit by a hydra-tentacle from Cassandra, who mistook Hysteria as Roxanne.[46]
To die again[]
The shattered remains of Hysteria barely clings to life. Her soliloquy describes two warriors that fought her on Rockwell Hill—warrior No. 4, Rosemary. And a mysterious, smiling warrior, resembling Teresa, a new single-digit that is never named. The smiling warrior's attack weakened Hysteria, allowing No. 4 to deliver the coup de grace.[47]
As Hysteria remembers the face of the smiling warrior, the remaining Yoma Energy inside Hysteria takes over her mind. Hysteria begins speaking like Priscilla, accusing the unnamed warrior of being a murderer. Finally, the Yoma Energy takes the shape of Priscilla.[48]
Miria bounces backs from the shock. Deneve and Helen, also recognizing Priscilla, attack the image, but it is only an apparition, which dissipates. Hysteria is dead.[49]
Executive chamber[]
Deserted[]
The warriors find it deserted.[50] In flashback, Raki says personnel fled headquarters when Cassandra, Roxanne and Hysteria awakened.[51]
Miria orders Deneve and Helen to search the premises. And that any personnel found are to be killed.[52]
Secret room[]
But Miria's orders are a ploy to distract her comrades as Miria relocates a pilastered portal. Miria forces open a wall panel, leading to a downstairs chamber, where two specimens of the Dragons' Descendents are chained. Tubes attached to their bodies provide life-support.[53]
Limt[]
Limt appears. For unexplained reasons, he has stayed behind.
He gives the real name of the Dragons' Descendents—the アサラカム[54] (Asarakamu). He explains that they are a hermaphrodite people, who once awaken, remain in their dragon form. And can live up to 200 years. And their tissue, when combined, provide the source material used for implants in humans, who develop into Yoma.
The smaller, humanoid specimen, when awakened, would become like the larger, dragon-like specimen.[55]
Miria admits being inside the chamber nine years ago, then realizing the source of the Yoma. Miria notes that the Organization violated their own rule about never killing humans, as they turned humans into Yoma, then ordered their warriors to kill these former humans. She beheads Limt, then cuts the life-support tubes of the specimens, which instantly decay.[56]
End of Organization[]
As the Ghosts regenerate the wounded on the battlefield, Miria announces the death of Limt.[57]
References[]
Tankōbon Claymore volumes cited are VIZ Media (en-us) editions, unless otherwise noted. Manga scenes (chapters) not yet translated cite Shueisha tankōbon (ja) editions. Manga scenes not yet published in tankōbon form cite Jump SQ (ja) editions. Fragments of Silver Omnibus (総集編 銀の断章 Gin no Danshou) 1–3, Shueisha, are only available in Japanese. Anime scenes (episodes) cited are FUNimation (en-us) editions, unless otherwise noted.
- ↑ Claymore 20, Scene 113, p. 189
- ↑ Claymore 20, Ediciones Glénat España, Scene 113, p. 171
- ↑ Claymore 20, Star Comics, Scene 113, p. 167
- ↑ Claymore 20, Shueisha, Scene 113, p. 171
- ↑ Claymore DS Game handbook, p. 28
- ↑ Claymore DS Game handbook, p. 28
- ↑ Claymore 20, Shueisha, Scene 113, p. 189
- ↑ Claymore 20, Scene 113, p. 189
- ↑ Claymore 20, Scene 113, p. 170
- ↑ Claymore 20, Scene 113, p. 185
- ↑ Claymore 21, Scene 114, p. 19
- ↑ Claymore 21, Scene 114, pp. 20–21
- ↑ Claymore 21, Scene 114, p. 22
- ↑ Claymore 21, Scene 114, pp. 23–24
- ↑ Claymore 21, Scene 115, p. 67
- ↑ Claymore 21, Scene 116, pp. 83–85
- ↑ Claymore 21, Scene 116, pp. 86–92
- ↑ Claymore 21, Scene 118, pp. 154–155
- ↑ Claymore 21, Scene 118, pp. 161–163
- ↑ Claymore 21, Scene 119, pp. 168–169
- ↑ Jump SQ, December 2011, Claymore, Scene 120, p. 285
- ↑ Jump SQ, December 2011, Claymore, Scene 120, p. 287
- ↑ Jump SQ, January 2012, Claymore, Scene 121, pp. 198–199
- ↑ Jump SQ, January 2012, Claymore, Scene 121, p. 201
- ↑ Jump SQ, January 2012,Claymore, Scene 121, p. 205
- ↑ Jump SQ, February 2012, Claymore, Scene 122, p. 615
- ↑ Jump SQ, February 2012, Claymore, Scene 122, p. 620
- ↑ Jump SQ, February 2012, Claymore, Scene 122, p. 621
- ↑ Jump SQ, February 2012, Claymore, Scene 122, pp. 622–623
- ↑ Jump SQ, February 2012, Claymore, Scene 122, p. 624–627
- ↑ Jump SQ, February 2012, Claymore, Scene 122, pp. 632–633
- ↑ Jump SQ, February 2012, Claymore, Scene 122, p. 634
- ↑ Claymore 11, Scene 59, p. 60
- ↑ Jump SQ, March 2012, Claymore, Scene 123, p. 610
- ↑ Jump SQ, March 2012, Claymore, Scene 123, p. 623
- ↑ Jump SQ, May 2012, Claymore, Scene 125, p. 676
- ↑ Jump SQ, April 2012, Claymore, Scene 124, p. 253–264
- ↑ Jump SQ, April 2012, Claymore, Scene 124, p. 238
- ↑ Jump SQ, April 2012, Claymore, Scene 127 , p. 241
- ↑ Jump SQ, April 2012, Claymore, Scene 124, p. 243
- ↑ Jump SQ, April 2012, Claymore, Scene 124, p. 246
- ↑ Jump SQ, April 2012, Claymore, Scene 124, p. 249
- ↑ Jump SQ, April 2012, Claymore, Scene 124, p. 255–256
- ↑ Jump SQ, April 2012, Claymore, Scene 124, p. 265
- ↑ Jump SQ, April 2012, Claymore, Scene 124, p. 267
- ↑ Jump SQ, May 2012, Claymore, Scene 125, pp. 679–683
- ↑ Jump SQ, May 2012, Claymore, Scene 125, pp. 689–691
- ↑ Jump SQ, May 2012, Claymore, Scene 125, pp. 691–697
- ↑ Jump SQ, May 2012, Claymore, Scene 125, pp. 699–700
- ↑ Jump SQ, June 2012, Claymore, Scene 126, p. 240
- ↑ Jump SQ, June 2012, Claymore, Scene 126, pp. 240–241
- ↑ Jump SQ, June 2012, Claymore, Scene 126, pp. 241–242
- ↑ Jump SQ, June 2012, Claymore, Scene 126, p. 243–245
- ↑ Jump SQ, June 2012, Claymore, Scene 126, p. 246
- ↑ Jump SQ, June 2012, Claymore, Scene 126, pp. 246–249
- ↑ Jump SQ, June 2012, Claymore, Scene 126, pp. 250–254
- ↑ Jump SQ, June 2012, Claymore, Scene 126, p. 258–261


All items (23)


